The Day I Thought My Favorite Portrait Lens Was Ruined Forever
Let’s be honest: nothing kills a creative mood faster than seeing a huge, oily fingerprint right in the middle of your expensive lens. I used to be so terrified of scratching my glass that I’d barely take my camera out of the bag. I even ruined a $900 portrait lens once by panicked-scrubbing it with my shirt. It was a painful, expensive mistake. That’s why I wrote this guide—to show you exactly how to clean your gear like a pro without the anxiety or the risk of permanent damage.
I still remember the sudden sinking feeling in my stomach when I noticed a massive, greasy thumbprint right in the middle of my favorite 85mm portrait glass. I was in the middle of a beautiful outdoor sunset shoot, and absolute panic instantly took over my mind. Without thinking clearly, I grabbed the edge of my rough cotton t-shirt and aggressively wiped the front element. The thick smudge just smeared further across the surface, making it look incredibly foggy.
But worst of all, when I held it up to the light, I noticed tiny, permanent micro-scratches left behind in the beautiful anti-reflective coating. My heart completely dropped in that moment. I knew I had just permanently damaged a piece of premium gear that took me months of hard savings to buy. That single moment of careless panic taught me a very hard, expensive lesson about proper gear maintenance.
Have you ever felt that exact same overwhelming anxiety when a speck of dust lands on your expensive glass? It is incredibly frustrating to invest your hard-earned money into premium camera equipment, only to live in constant fear of accidentally destroying it.
Most passionate photographers, especially beginners, struggle deeply with this silent daily anxiety. Every time we shoot outdoors, the unpredictable wind blows microscopic sand and dirt particles directly onto our gear. We try our absolute best to be careful, but random accidents happen, and a rogue finger always seems to find its way onto the front element.
The heavy stress of seeing a potentially award-winning shot ruined because of a dirty lens is bad enough. But the constant fear of actually scratching that fragile top coating while trying to fix the problem? That specific worry keeps many of us up at night. We often end up spending much more time worrying about our equipment than actually enjoying the creative process of photography.
You just want absolute peace of mind when you pack your camera bag. You want to capture sharp, stunning, crystal-clear images without second-guessing your daily maintenance routine. It is mentally exhausting to read completely conflicting advice on internet forums where everyone confidently claims their personal method is the only safe way. You do not want to ruin your beloved gear, and you certainly do not want to pay for ridiculously expensive factory repairs.
💡 The 30-Second Cheat Sheet
If you're in a hurry, remember these four rules to keep your glass safe:
- Air First, Cloth Last: Always blow away loose dirt before you touch the glass.
- No T-Shirts: Your clothes are basically sandpaper for lens coatings. Use microfiber only.
- Center to Edge: When wiping, move in a spiral from the middle outward to push dirt away.
- Less is More: Don't clean just for the sake of it. If there’s no smudge, don't touch it!
Decoding the Invisible Shield on Your Premium Glass
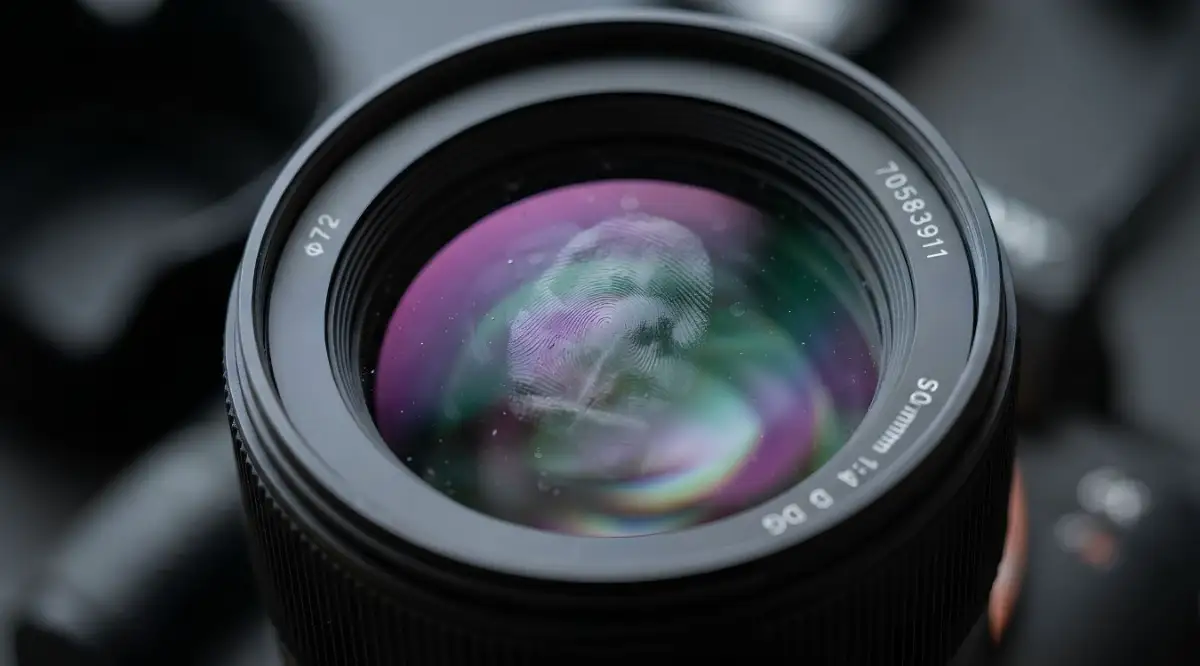
Before we talk about exactly how to wipe away dirt, we need to understand what we are actually touching. When you look at a high-end lens, you are not just looking at a simple piece of raw glass. You are looking at a highly engineered, extremely thin layer of chemicals baked onto the surface.
This is known as the anti-reflective coating. Its main job is to stop light from bouncing off the glass so your photos do not look washed out or full of ugly glare. Some modern lenses also have an extra fluorine layer on top to help repel water and natural skin oils.
These microscopic chemical layers are highly sensitive to physical friction. If you rub them the wrong way, or with the wrong materials, you will literally scrape the chemicals right off. Once that protective layer is gone or scratched, no amount of money can magically put it back.
This is why taking a random tissue from your pocket is the absolute worst thing you can do. Tissues are basically made from processed wood fibers. When you rub a tissue on your lens, you are essentially dragging tiny pieces of wood across a delicate chemical shield.
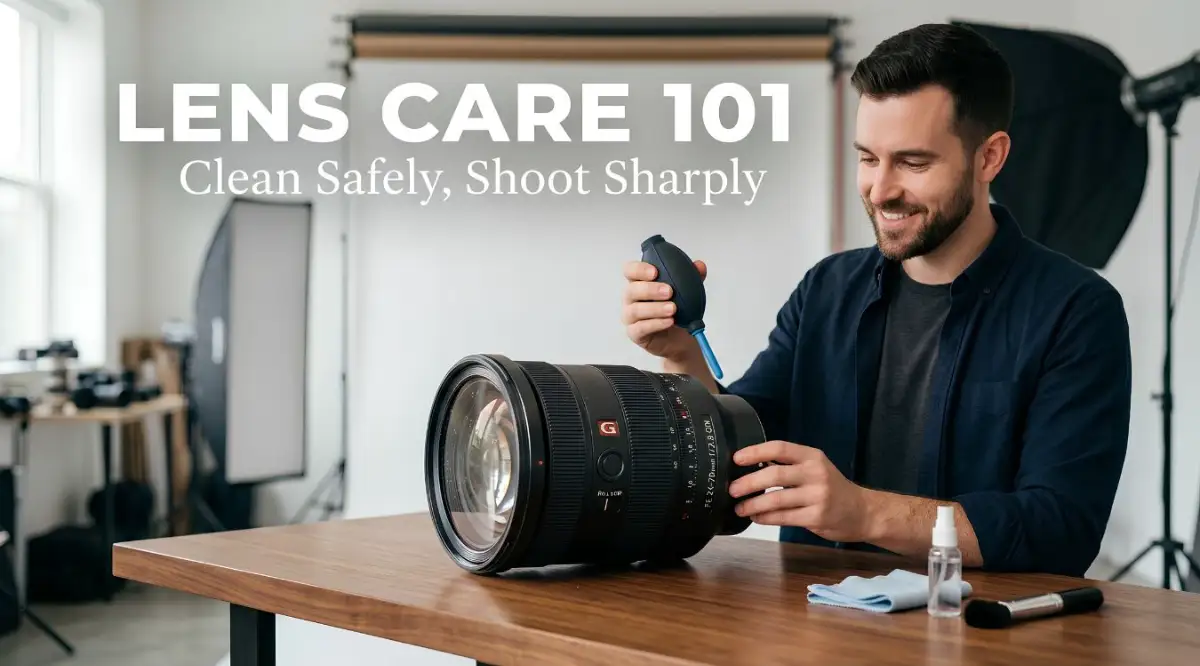
Identifying Your Worst Enemies in the Field
| The Problem | The Fast Fix | Risk Level |
| Loose Dust / Sand | Air Blower (Rocket style) | Low |
| Fingerprints / Oil | Lens Pen or Microfiber + Fluid | Medium |
| Salt Spray (Beach) | Distilled Water Damp Cloth | High |
| Inside the Lens | Professional Service Center | Extreme |
Not all dirt is created equal, and treating a fingerprint the same way you treat beach sand is a massive mistake. Let us break down the specific things that threaten your gear daily.
First, we have loose environmental dust and microscopic sand particles. These are basically tiny, jagged rocks floating in the air. If you press a cloth directly over a piece of sand and drag it, you will carve a permanent canyon into your anti-reflective coating.
Then, we have the dreaded fingerprint. Human skin naturally produces oils and mild acids to stay healthy. When those oils transfer to your lens, they act like a sticky glue that grabs onto dust. Over time, the mild acid in your sweat can actually start eating away at the chemical coating if left uncleaned.
Finally, we have dried water spots from unexpected rain or sea spray. Rainwater is rarely pure; it usually carries dissolved minerals and pollution from the atmosphere. When the water evaporates on your glass, it leaves behind hard mineral deposits that are incredibly stubborn to remove.
Myth vs Reality: Common Lens Care Misconceptions
Building Your Ultimate Safe Maintenance Toolkit
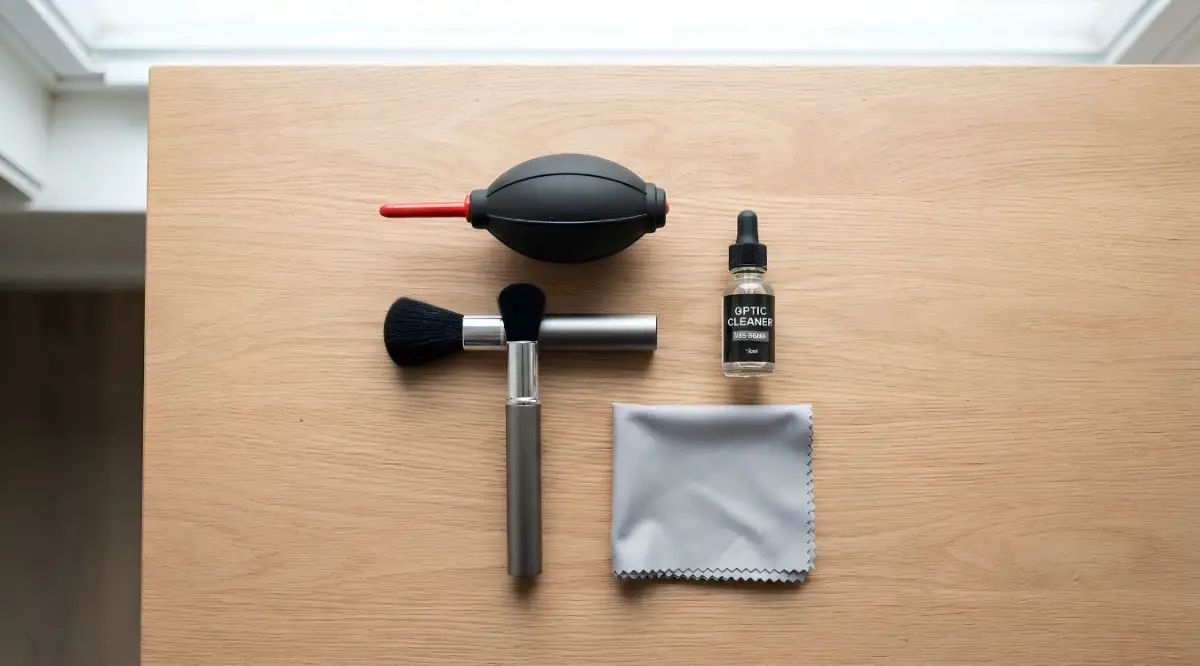
To protect your investment, you need a few very specific tools. Do not worry, these items are highly accessible and will save you from major headaches down the road.
Your first line of defense is a high-quality silicone air blower. I highly recommend a rocket-style blower because it features a one-way valve. This means it sucks in clean air from the back and shoots a powerful stream of air out the front, rather than just blowing dusty air around in a circle.
Next, you need a dedicated, ultra-soft lens brush with synthetic bristles. You should only use this brush for your camera gear and keep it capped when not in use. If the bristles touch your oily fingers or the inside of a dirty bag, the brush is officially contaminated.
You will also need individually wrapped, pre-moistened lens wipes or a dedicated bottle of optical cleaning fluid. Make sure any liquid you use is specifically engineered for multi-coated camera lenses. Stay far away from anything that smells heavily of harsh chemicals or alcohol meant for household chores.
Lastly, invest in a stack of premium optical microfiber cloths. These are woven tightly to trap microscopic oils without leaving annoying lint behind. You should treat these cloths like surgical instruments, keeping them stored in sealed plastic bags.
The Golden Rule of Dry Cleaning First
The biggest secret to keeping your gear flawless is a concept called "dry cleaning before wet cleaning." You should never, under any circumstances, apply a liquid or a cloth to a lens that still has loose particles on it.
Start by holding your camera body so the lens is pointing entirely downward toward the floor. Gravity is your best friend here. Take your silicone air blower and give the front element several strong, aggressive puffs of air.
Because the lens is facing down, the air will dislodge the loose dust, and gravity will pull it safely away from the glass. If you hold the camera facing up while blowing, the dust will just fly into the air and land right back down on the surface.
I used to just blast air at my lens while it was sitting flat on my desk, and I always wondered why the dust just landed right back on the glass a second later. My biggest realization was simply holding the camera upside down while using my silicone blower so gravity could actually pull the dirt away. That one tiny adjustment completely changed my cleaning routine and saved me from so many hidden micro-scratches.
If there are still a few stubborn dust specks clinging to the edges, uncap your clean synthetic brush. Very gently, with almost zero downward pressure, sweep the dust away from the center toward the outer edges of the frame.
Watch This Expert Demonstration:
Want to see exactly how your zoom lens sucks in hidden dirt like a vacuum cleaner every time you use it? Watch this short video below to understand this mechanical trap, and then keep reading to learn how to stop this expensive dust problem forever!
Once you are absolutely certain that there are no loose particles left on the glass, you can move on to addressing the actual smudges. If your lens just had dust on it and no fingerprints, you can actually stop right here. Less touching always equals less risk.
Mastering the Art of Safe Wet Cleaning
My "Clean-Check" Hack:
Before you decide you're finished, take your phone's flashlight and shine it through the lens from the back side. You’ll see every tiny bit of dust or streak that you missed from the front. If it looks clear under a bright LED, you’re ready to shoot!
When you are forced to deal with an oily fingerprint or a dried water spot, dry tools simply will not work. You need a safe liquid solvent to break down the greasy chemical bonds safely.
Never spray or drop cleaning fluid directly onto the glass element itself. Liquid can easily run down the curved surface, slip into the tiny cracks around the edge of the lens barrel, and damage the internal electronics.
Instead, apply one or two small drops of optical fluid directly onto a clean, folded section of your microfiber cloth. Wait a few seconds for the liquid to absorb slightly so it is damp, not completely dripping wet.
My Personal Insight: I completely ruined a cheap kit lens early in my journey by spraying liquid directly onto the glass. The liquid seeped inside the barrel, and within two weeks, dark fungus started growing inside the internal elements. Now, I strictly apply moisture only to the cloth first, and my gear has remained perfectly safe ever since.
Press the damp section of the cloth very lightly against the exact center of the lens. You do not need to apply heavy pressure; let the chemicals in the fluid do the hard work of melting the oil.
Using a slow, smooth, circular motion, wipe outward from the center toward the metal edges. Think of this motion like drawing a continuous spiral shell. This specific technique ensures any remaining unseen debris is pushed away to the outside rim, rather than being dragged back through the middle of your image frame.
Once you reach the outer edge, flip your microfiber cloth over to a completely dry, clean section. Gently run the dry side over the same spiral path to pick up any leftover moisture before it has a chance to evaporate and leave a new streak.
Handling Emergency Situations in the Wild
Sometimes, you do not have your perfect studio toolkit available when disaster strikes. Imagine you are hiking up a beautiful, windy mountain and a sudden gust of wind covers your front element in thick yellow pollen.
If you do not have an air blower, try to find a completely wind-blocked area behind a large rock or tree. Remove your lens hood and use your mouth to blow a strong, controlled stream of air. Be incredibly careful not to accidentally spit or let saliva hit the glass, as stomach acids are terrible for the anti-reflective layers.
If you get splashed by salty ocean water at the beach, you are facing a massive gear emergency. Sea salt is highly corrosive and incredibly abrasive. Do not wipe it immediately.
Wait until you can get back to your car or hotel. Use a generously damp cloth soaked in pure, distilled drinking water to gently dab the salt spots. Dabbing, rather than wiping, helps dissolve the rough salt crystals safely without dragging them across the fragile surface.
Once the salt has completely dissolved into the water on the cloth, you can follow up with your standard dry microfiber wipe. Always prioritize patience over speed when dealing with environmental hazards.
Master-Level Strategies for Flawless Gear Protection
We have already covered the basics of removing dust and wiping away those annoying oily smudges. But if you want your expensive glass to last a lifetime, you need to think beyond the occasional wipe-down. Long-term gear protection requires a solid understanding of your environment.
One of the biggest threats to your optical coatings is actually invisible to the naked eye. We are talking about severe temperature changes and the silent damage caused by condensation. Imagine walking out of a highly air-conditioned hotel room directly into a hot, humid tropical jungle.
Your cold camera immediately fogs up, right? That foggy moisture is not just resting on the outside glass. It is actively forming inside the tiny air gaps of your lens barrel. If you try to wipe that external fog away immediately, you are just smearing water and potentially trapping moisture around the weather-sealing gaskets.
Instead, you should always keep your gear inside a zipped camera bag when moving between extreme temperatures. Let the bag slowly adjust to the new temperature for about thirty minutes. This slow transition entirely prevents sudden condensation from forming on your expensive optical layers.
The Hidden Danger of Zoom Vacuuming
Here is a fascinating mechanical reality that most beginners never think about. When you use a large zoom lens, the front element physically extends outward and pulls back inward. This simple pushing and pulling motion acts exactly like a mechanical vacuum cleaner.
As you zoom out, the barrel literally sucks surrounding air right into the internal chambers of the lens. If the outer barrel is covered in fine dust or beach sand, that debris gets sucked straight inside. Once dust gets behind the front element, you cannot clean it without paying a professional to completely disassemble the unit.
Before you zoom back in, always take a quick second to inspect the extended plastic or metal barrel. Give it a gentle brush to remove any sitting dirt. This single daily habit will save you hundreds of dollars in factory cleaning fees.
Defeating the Silent Killer: Lens Fungus
Did you know that living organisms can actually grow inside your camera gear? Lens fungus is a very real, incredibly terrifying problem for photographers who live in humid climates. This spider-web-like mold literally eats the chemical anti-reflective coatings right off the glass.
Fungus thrives in dark, warm, and highly humid environments. If you store your slightly damp camera inside a dark, closed backpack for a few weeks, you are creating the perfect breeding ground for mold. The resulting damage is entirely permanent and usually impossible to reverse.
To completely avoid this nightmare, you must store your lenses in a dry, well-ventilated space. You can invest in a dedicated electronic dry cabinet that automatically regulates internal moisture levels. If you are on a tight budget, you can easily use rechargeable silica gel desiccants to pull excess moisture out of your storage boxes.
The Most Destructive Gear Habits You Must Break Today
Even with the best intentions, I see passionate creators making terrible mistakes with their maintenance routines every single day. These innocent mistakes often result in completely destroyed equipment. We need to expose these bad habits so you never fall into the same traps.
The most terrifying mistake I see regularly is the use of compressed canned air. Many beginners assume that if a hand blower is good, a high-pressure can of air must be much better. This assumption could instantly destroy a two-thousand-dollar piece of glass in three seconds.
Why Canned Air is Your Worst Enemy
Compressed air dusters are not actually filled with normal air. They contain highly pressurized liquid chemical propellants. When you press the trigger, the liquid turns into a gas, causing an immediate and drastic drop in temperature.
If you accidentally spray this freezing chemical liquid onto a warm glass element, the extreme thermal shock can literally shatter the glass into tiny pieces. Even if the glass somehow survives, the powerful burst of air will force microscopic sand particles straight past the weather-sealing gaskets.
According to experts who regularly disassemble broken gear, improper use of compressed air is one of the leading causes of internal mechanical failure. The pressure simply drives the dust deeper into the sensitive focusing motors where it grinds away at the gears.
The Toxic Reality of Household Cleaners
Another massive error is using generic household glass cleaners on photography equipment. The blue liquid sitting under your kitchen sink is designed for thick, untreated window glass. It is absolutely not designed for delicate, multi-coated optical elements.
Most generic window cleaners contain very high levels of harsh ammonia. Ammonia is highly corrosive and will literally dissolve the expensive anti-reflective layers right off your lens. You will be left with ugly, permanent chemical burns that cause massive ghosting and glare in all your future photos.
If you accidentally ruin your gear using the wrong chemicals, a warranty will never cover the damage. Proving it was a manufacturer defect rather than user error becomes a stressful battle. It feels surprisingly similar to navigating complex legal issues, where having a complete blueprint for documenting workplace discrimination before seeking legal help is your only defense. You must protect yourself by only using certified, optical-grade solutions from the very beginning.
The Truth About T-Shirts and Paper Towels
We have all been tempted to use the edge of a soft cotton t-shirt to wipe away a quick smudge. It feels soft to the touch, so it must be completely harmless, right? This is entirely false.
Your clothes collect microscopic dust, sweat, and abrasive dirt particles throughout the day. When you rub that fabric against your lens, you are aggressively dragging those hidden rocks across the fragile coating. The same exact rule applies to rough paper towels and thick napkins.
Paper products are manufactured from harsh wood pulp fibers. Looking at a paper towel under a strong microscope reveals jagged, sharp edges that will easily carve micro-scratches into your gear. The damage might not be visible immediately, but over a few months, your lens will look permanently cloudy. Optical scientists warn that mechanical abrasion is the fastest way to ruin a high-quality imaging surface.
Your New Daily Habit for Flawless Photography
Protecting your investment does not have to be an overwhelming or stressful chore. By building a few simple, highly intentional habits, you can keep your glass looking exactly like it did the day you unboxed it.
The secret to great maintenance is consistency. Always start your day with a quick visual inspection under a bright desk lamp. Check the front element for any obvious dust or weird water spots before you even pack your bag.
Always keep your protective lens caps firmly attached when the camera is not actively resting against your eye. Leaving your camera hanging naked on a neck strap while walking through a crowded street is just asking for a disaster. People bump into things, and walls are surprisingly unforgiving against delicate glass.
A Quick Post-Shoot Checklist
When you return home from a long, creative day, do not just throw your dirty gear into a closet. Take five minutes to gently wipe down the plastic or metal outer body of the camera with a lightly damp towel. Removing the acidic sweat and hand oils from the camera body prevents the rubber grips from peeling off over time.
Use your manual silicone blower to puff away any loose dirt from the glass elements before putting the lens away. Storing your gear perfectly clean means you are instantly ready for your next big adventure without any stressful delays.
If you simply follow the rule of "dry cleaning first," respect the delicate nature of optical coatings, and avoid aggressive household chemicals, your gear will serve you beautifully for decades.
My Personal Promise to You: I used to live in constant fear of scratching my equipment, and it honestly ruined the fun of photography for me. Once I stopped listening to bad internet advice and built a proper, gentle cleaning routine, all that anxiety completely disappeared. You have the exact right tools and knowledge now. Go out there, enjoy your amazing gear, and focus on capturing those breathtaking moments without any fear!
Common Questions About Safe Gear Maintenance
Can I use standard rubbing alcohol to wipe my lenses?
You should absolutely avoid standard rubbing alcohol from the pharmacy. It often contains heavy water impurities and harsh additives that can strip the delicate protective coatings and leave terrible streaks behind. Always stick to professional optical cleaning fluids designed specifically for multi-coated glass.
Are pre-moistened lens wipes safe for camera gear?
Yes, high-quality pre-moistened wipes from trusted optical brands are generally very safe and incredibly convenient for travel. Just make sure you gently blow away any loose, hard sand particles with an air blower before dragging the wet wipe across the surface.
How frequently should I actually clean my front element?
You should only perform a wet clean when there is a highly visible, stubborn smudge or oily fingerprint that negatively affects your image quality. For daily maintenance, gently blowing away loose dust with a silicone air blower is more than enough.
What should I do if beach sand gets inside my focus ring?
Never try to force the ring to turn, as this will crush the sand and permanently destroy the internal plastic gears. Use a clean, dry toothbrush to very gently sweep the tiny crevices while holding the lens upside down. If the grinding sound continues, you must send it to a professional service center immediately.
Does a small scratch on the front glass ruin my photos?
Surprisingly, a tiny, single micro-scratch on the front element rarely shows up in your final images, especially at wider apertures. However, multiple scratches or heavily worn chemical coatings will severely reduce your overall image contrast and introduce terrible flaring when shooting into the sun.
Taking care of your camera gear should never feel like a scary chore that keeps you from enjoying your creative hobby. I promise that once you put together a simple, safe cleaning kit and follow these easy steps, you will feel so much more confident taking your camera on wild adventures. Grab your silicone blower, give your favorite lens a gentle puff of air today, and get back to capturing amazing memories without the stress!
Disclaimer: The information provided in this article is strictly for educational and informational purposes regarding standard photography equipment maintenance. Always refer to your specific manufacturer's user manual before applying any cleaning solutions to your personal gear. We are not responsible for any accidental damage or voided warranties resulting from improper handling of your equipment.