
The Frustrating Reality of Getting Exactly What You Pictured
Ever typed exactly what you wanted into an AI image generator, only to get a weird, mutated mess? Yeah, I have been there too. The good news is that your software isn't broken—you just need to adjust how you talk to it. Let's fix your prompting habits so you can finally get the exact picture you have in your head, without wasting hours of your time.
Ordinary folks are losing sleep over this exact same issue every single day. We just want a picture that perfectly matches the clear image we have in our heads. Instead, everyday users are spending hours battling robotic systems that do not seem to understand basic human logic.
It completely destroys your natural creative flow and leaves you feeling incredibly stressed out. You sit down at your computer feeling deeply inspired, but after thirty failed attempts, your mental peace is totally ruined.
In a Rush? Here’s How to Fix Your Images Fast:
- Drop the grammar: Stop writing full sentences. Use short, comma-separated tags instead.
- Use negative rules: Always fill out the negative prompt box to block weird errors (like extra fingers).
- Step-by-step testing: Start with a basic idea, then add background and lighting details one by one.
- Save your seeds: Lock in your favorite results using Seed Numbers so you can edit the image without losing your main character.
Taking Back Control Over Your Digital Canvas
Getting the software to listen to you requires a massive shift in how you talk to the machine. We need to stop treating these programs like human artists who can guess our intentions. Instead, we must treat them like very strict, literal machines that need perfectly clear instructions.
By applying a few logical rules, you can completely transform your messy results into breathtaking visuals. Let us look at the most effective ways to command these systems accurately.
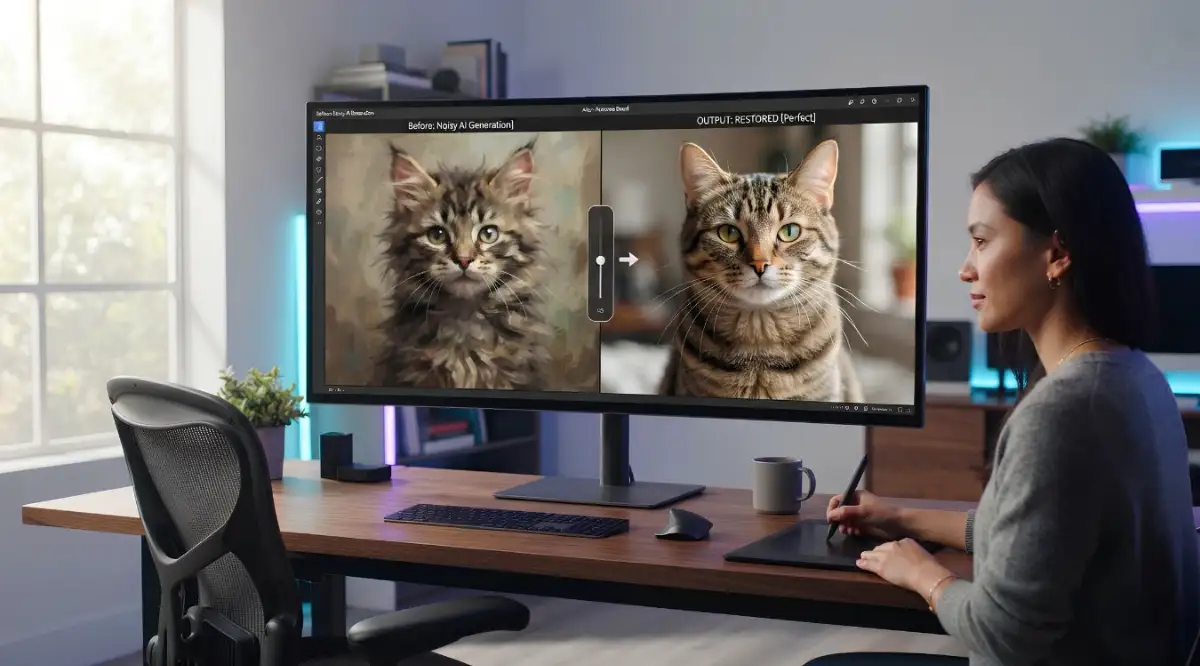
Stop Writing Novels and Start Using Descriptive Tags
One of the biggest mistakes people make is talking to the machine like it is a human friend. Writing long, flowing sentences with lots of joining words actually confuses the system. The software breaks your text down into tiny pieces called tokens.
When you use words like "and", "the", or "with", you are wasting valuable processing power on useless data. Instead, you need to use short, punchy tags separated by commas.
For example, instead of saying "a picture of a cute dog running through a green park during a sunny day", simplify it. Try writing "cute dog running, green park, sunny day, highly detailed". This gives the engine a much clearer map of what you actually want to see.
You will notice an instant boost in how well the machine understands your core subject. The less fluff you use, the better the final image will look.
My biggest lightbulb moment came when I finally stopped trying to write beautiful sentences and started treating the software like a stubborn machine. I wasted so much money on credits writing huge, emotional paragraphs, but the day I switched to using short, punchy tags, my daily success rate went through the roof.
The Hidden Magic of Direct Negative Prompting
Many users completely ignore the negative prompt box provided by most generation platforms. They assume that if they describe the good things well enough, the bad things will not appear. This is a massive misunderstanding of how machine learning models actually render images.
The system pulls from billions of random pictures, many of which contain blurry edges, extra limbs, and ugly watermarks. You must explicitly tell the program what you absolutely hate.
I always used to ignore the negative prompt box, thinking my main description was detailed enough for the job. My biggest realization was that typing a few simple words—like "extra fingers, blurry, low resolution, deformed"—fixed 90% of my errors instantly. It gave me a sudden sense of control over my final output.
Building a strong list of negative words is like setting up strong guardrails on a dangerous highway. It keeps your creative output safely on the right track. Always keep a list of your favorite negative tags in a simple text document for quick access.
Steal My Quick Negative Prompt Cheat Sheet:
- For Portraits: mutated hands, extra fingers, deformed faces, cross-eyed, blurry, poorly drawn, extra limbs.
- For Environments: text, watermarks, signature, low resolution, ugly borders, cropped.
- For Realism: cartoon, 3d render, illustration, painting, oversaturated, plastic skin.
Mastering the Art of Iterative Testing
Most beginners try to build the perfect masterpiece on their very first attempt. They throw fifty different descriptive words into the box and hope for a miracle. When the result looks terrible, they have absolutely no idea which word ruined the picture.
The smartest way to build accuracy is through a process called iterative testing. You start with the absolute bare minimum, like "a red apple on a wooden table".
Once the machine gives you a good apple, you slowly add one new element at a time. Next, you might add "morning sunlight streaming through a window". If the lighting looks wrong, you instantly know that your newest phrase caused the problem.
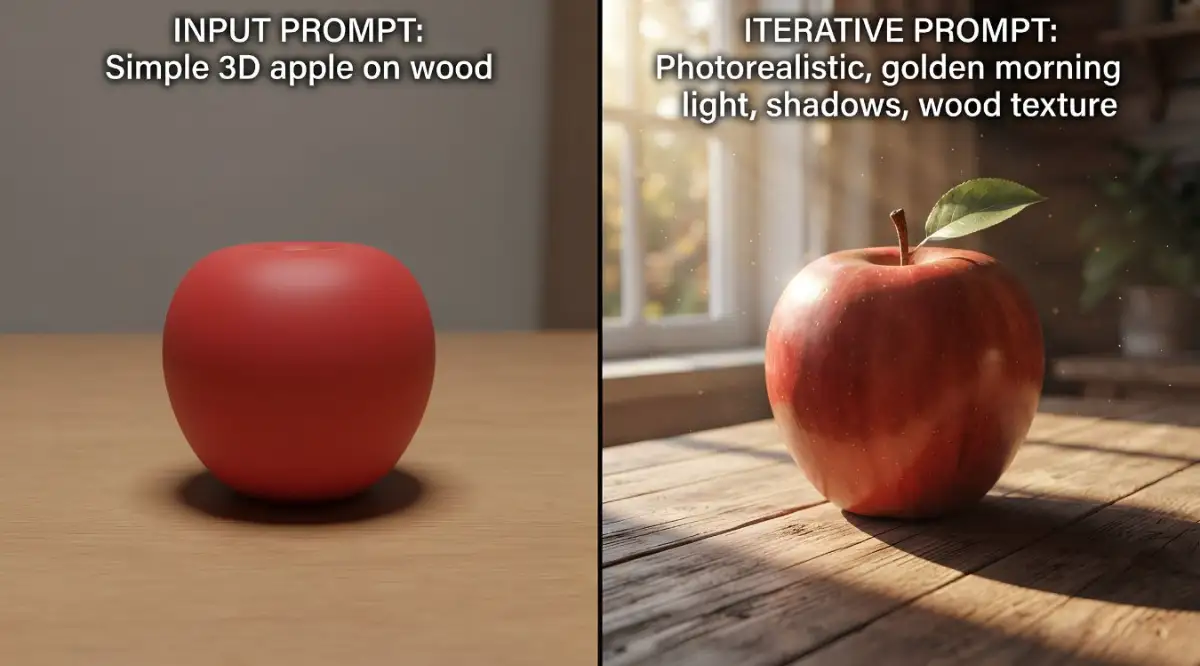
This highly logical approach saves you a massive amount of time and frustration. It prevents you from guessing in the dark and helps you understand how the machine interprets your words.
Watch This Expert Breakdown on Iterative Phrasing
Before we move on to camera angles and lighting, watch this quick video to see exactly how I build my test prompts step-by-step. Seeing this process in action makes everything click instantly, and it will make the rest of the advanced tricks in this guide so much easier to use!
Controlling the Viewer's Eye with Camera Angles
If you do not specify a camera angle, the system will usually default to a boring, flat, straight-on view. This makes your pictures look incredibly generic and lifeless. To get exactly what you want, you need to use basic photography terminology.
Tell the machine exactly where you want the imaginary camera to be placed. Words like "extreme close-up", "birds-eye view", or "low angle shot" completely change the mood of the generation.
If you want a dramatic superhero pose, a "low angle worm's-eye view" will make the character look incredibly powerful. If you are showing off a plate of food, a "top-down flat lay" is the industry standard.
By taking charge of the camera, you force the AI to frame the subject exactly how you pictured it. This simple addition makes your work look far more professional and intentional.
Understanding Lighting to Set the Perfect Mood
Lighting is the secret ingredient that turns a cheap-looking graphic into a photorealistic masterpiece. An engine will often use flat, unnatural lighting if you do not give it specific instructions. You must tell the system exactly how the light is hitting your main subject.
Instead of just saying "bright", try using terms like "golden hour lighting", "cinematic rim lighting", or "moody volumetric fog". These specific terms trigger the highest quality data sets within the machine's memory.
Myth vs Fact: Nailing the Lighting
- The Myth: Typing "ultra-realistic 8k HD" automatically fixes bad lighting.
- The Fact: The machine needs actual photography terms. Swapping generic words for real styles like soft diffuse lighting, harsh neon rim light, or dramatic chiaroscuro will totally change the mood of your image!
For interior shots, mentioning things like "soft studio lighting" or "neon cyberpunk glow" completely alters the color palette. Lighting actually covers up minor mistakes that the machine might make with the subject's anatomy.
When the shadows and highlights look realistic, the human eye is easily tricked into ignoring tiny flaws. Never hit the generate button without mentioning your desired lighting setup.
The Power of Aspect Ratios on Composition
Many people leave their settings on a perfectly square box because it is the default option. However, the shape of your canvas dramatically impacts how the AI arranges the elements inside it. A tall, vertical shape forces the machine to focus entirely on a single standing character.
A wide, cinematic rectangle tells the machine that you want to see a sprawling background or a detailed landscape. If you ask for a huge mountain range but use a tiny square frame, the system gets terribly confused.
It will try to crush a massive scene into a tiny box, resulting in a distorted, muddy mess. Always match your aspect ratio to the actual subject you are trying to create.
Most platforms allow you to change this easily by adjusting a simple slider or typing a small command at the end of your text. Taking two seconds to fix the frame shape will drastically improve your overall composition.
Myth vs Reality: Exposing Common AI Image Misconceptions
There is a lot of bad advice floating around the internet about how to talk to these programs. Let us clear up some of the most frustrating myths that are holding you back.
Myth: Using all capital letters makes the machine listen to you better.
Reality: The software cannot feel human emotions like anger or urgency. Using uppercase letters does absolutely nothing to change the mathematical weights of your words.
Myth: You must use highly complex, dictionary-level vocabulary to get good pictures.
Reality: Simple, everyday language actually works much better. The machine was trained on standard internet captions, so using plain English gives you the most predictable outcomes.
Myth: If an image is ruined, you just have to start completely over from scratch.
Reality: You can use powerful seed numbers to lock in the parts of the image you like while changing the parts you hate.
The Secret of Seed Numbers for Absolute Consistency
Have you ever generated a character with the perfect face, but they were wearing the wrong colored shirt? You try to change the color in your text, but the machine generates a completely different person next time. This happens because the system rolls a random mathematical dice every single time you hit enter.
That random dice roll is called a seed number. Every single picture generated has a unique, hidden number attached to it.
If you find out what that number is and paste it into your settings, the machine will start from the exact same starting point. This means you can keep your perfect character's face while simply changing their clothing or background.
Learning how to lock in a seed number is the ultimate trick for creating consistent characters for a comic book or a marketing campaign. It stops the random gambling and gives you genuine, reliable control over your art.
Weighting Words for Maximum Impact
Sometimes the machine just stubbornly ignores a specific detail you asked for. You might type "a man with a red hat", but the program keeps giving you blue hats instead. When this happens, you need to tell the software which word is the most important part of your sentence.
You can apply extra weight to specific words to force the AI to pay attention. Depending on the software you use, this is usually done by putting brackets around the word and adding a small number next to it.
By manually increasing the mathematical weight of the word "red", the engine prioritizes that specific color above everything else. This is incredibly helpful when dealing with small, easily forgotten details like jewelry, eye color, or specific textures.
It acts like a digital highlighter, loudly telling the processor exactly what you care about the most.
Fixing Distorted Faces and Ruined Hands
The most famous problem with artificial generation is the creation of terrifying hands and deeply melted faces. This happens because the program struggles to understand the complex geometry of human joints and facial muscles. However, you do not have to accept these horrifying results as permanent failures.
The easiest fix is to completely change how close the camera is to your subject. If you ask for a full-body shot of a crowd, the machine simply does not have enough pixels to draw everyone's face perfectly.
Instead, ask for a "medium portrait shot" to force the system to dedicate all its computing power to one single face. If hands are the issue, you can smartly hide them by asking for "hands inside pockets" or "hands holding a large coffee cup".
Giving the hands an actual physical object to interact with makes it much easier for the AI to understand the required bone structure. Sometimes, the best technical fix is just a clever creative workaround.
Comparing Weak Phrases to Highly Accurate Commands
To truly understand how to talk to these machines, we need to look at real-world examples side by side. Changing just a few words can mean the difference between amateur trash and professional art.
Weak Command: A cool sports car driving fast on a road.
Accurate Command: Red sports car driving on wet asphalt, motion blur, heavy rain, glowing streetlights, cinematic lighting, 8k resolution.
Weak Command: A pretty girl sitting in a coffee shop.
Accurate Command: Close-up portrait of a young woman, drinking coffee, sitting near a large window, morning sunlight, soft bokeh background, photorealistic.
Notice how the accurate commands do not use complex poetry or long stories. They simply provide clear, vivid details about the subject, the environment, and the camera setup.

When you break your ideas down into these highly specific categories, the software finally understands exactly what you want. It removes all the confusing guesswork and allows the processor to do what it does best.
Emulating Specific Artistic Styles
If you want a picture to look like an oil painting, simply typing "oil painting" is rarely enough to get a great result. The AI has seen millions of terrible paintings alongside the beautiful ones. You need to give the system a much stronger historical anchor to work with.
Try combining the medium with a specific historical era or a famous technique. For example, using "19th-century impressionist oil painting, thick brush strokes, vivid colors" gives a deeply specific flavor.
You can also reference specific tools, like "shot on 35mm film, grainy texture, vintage polaroid". By mentioning the exact physical tools that artists use in the real world, the digital engine perfectly mimics those textures.
This technique breathes real human life into your digital creations. It takes your work out of the cold, robotic aesthetic and brings a warm, traditional feel to your screen.
By applying all of these highly practical techniques, you will immediately notice a massive drop in your failure rate. You will no longer waste hours staring at distorted, creepy generations that belong in a horror movie. Instead, you will smoothly guide the software exactly where you want it to go, enjoying a highly relaxing and productive creative session.
Taking Your AI Creations to the Professional Level
Once you understand the basic rules of talking to the machine, it is time to upgrade your entire workflow. The professionals you see creating flawless digital art are not just getting lucky with their words. They use a completely different set of secondary tools built right into the software to force the machine into submission.
Learning these advanced methods will completely separate your work from the average beginner who just types and hopes for the best. Let us look at some highly practical techniques that will guarantee long-term success.
The True Magic of Image-to-Image Generation
Sometimes, words are simply not enough to describe the specific vision inside your head. When I first started out, I spent hours trying to describe a very specific pose for a character, but the machine kept failing. Then, I discovered the incredible power of the "Image-to-Image" feature.
This feature allows you to upload a basic sketch or a reference photo alongside your text description. The software uses your uploaded picture as a strict structural guideline for the final output. You do not even have to be a good artist to make this work for you.
I often draw terrible, messy stick figures in a basic paint program just to show the machine where the character's arms should be. The AI looks at my stick figure, reads my highly detailed text prompt, and combines them into a beautiful masterpiece. This completely removes the painful guesswork from the generation process.
Mastering the Art of Selective Inpainting
There is absolutely nothing more heartbreaking than generating a stunning portrait, only to realize the subject has six fingers. Most beginners will simply throw the entire picture away and start over from scratch. This wastes a massive amount of your time and drains your mental energy.
Advanced users rely on a targeted feature called "Inpainting" to fix tiny mistakes without ruining the whole picture. Inpainting allows you to use a digital brush to highlight just the broken part of your image.
You can highlight the messed-up hand, type "perfectly formed hand resting on a table", and the machine will only regenerate that specific spot. The rest of your beautiful portrait remains completely untouched and perfectly intact. Learning this one single skill will drastically reduce your frustration levels immediately.
Expanding Your Canvas with Outpainting
Have you ever created an amazing character, but the camera zoomed in way too close to their face? You want to see their full outfit and the beautiful background, but the edges of the picture cut them off. This is where a powerful technique known as "Outpainting" completely saves the day.
Outpainting basically tells the artificial intelligence to zoom the camera out and invent the rest of the missing scene. The system analyzes the colors and textures of your original image and naturally extends the borders outward.
You can turn a tight, cramped portrait into a massive, sweeping cinematic landscape in just a few clicks. It gives you the ultimate freedom to reframe your perfect shots exactly how a professional photographer would.
Building a Personal Prompt Recipe Book
Relying on your human memory to remember complex generation commands is a terrible idea. You will inevitably forget that one specific magic word that gave you perfect lighting last week. To maintain high accuracy over a long period, you must build a personal swipe file.
Whenever you get a spectacular result, immediately copy the exact text and save it in a dedicated digital notebook. Over time, you will build a powerful library of reliable "recipes" for different styles, moods, and lighting setups.
Organize this document strictly by category, so you can easily find your favorite architectural prompts or portrait settings. Protecting your creative resources requires careful planning and a reliable strategy. It is much like the secret to building an emergency fund without ignoring your debt; you need a smart, organized system to manage your digital assets effectively.
Decoding Complex Software Parameters
Many generation platforms include secondary settings like "Stylize" or "Chaos" that deeply affect your final accuracy. Learning the complex settings of an AI platform can honestly feel overwhelming at first. It reminds me of the ultimate beginner's blueprint to understanding health deductibles and co-pays, where you just need a clear guide to decode the confusing terminology.
The "Stylize" setting tells the machine how much artistic freedom it is allowed to take with your words. If you set this number very high, the software will ignore your instructions and make things look excessively pretty or abstract.
If you want absolute, strict accuracy, you must keep the stylize value relatively low. Similarly, the "Chaos" setting determines how wildly different each of your four initial test images will look. Lowering the chaos forces the system to stay incredibly focused on your core idea.
To deeply understand how these parameters affect machine learning outputs, you can study educational materials from trusted institutions. For example, research from the Stanford Institute for Human-Centered Artificial Intelligence provides excellent insights into how generative models interpret human constraints.
Heartbreaking Errors That Will Ruin Your Generation Process
Even with the best tools available, it is incredibly easy to fall into bad habits that destroy your results. These common mistakes will silently drain your generation credits and leave you feeling completely hopeless. Identifying these pitfalls early is the best way to protect your mental peace and your wallet. Let us explore the dangerous habits you must completely avoid.
The Trap of Over-Prompting and Word Salad
The absolute most common mistake beginners make is desperately throwing fifty different adjectives into a single text box. They think that more words will automatically equal a more detailed and accurate picture. This is a massive misunderstanding of how the underlying mathematical models actually function.
When you give the machine too many conflicting instructions, it completely loses track of the main subject. If you ask for a neon glowing futuristic city that is also a dark medieval forest with bright sunny weather, the system simply breaks down.
It tries to mix all these impossible concepts together, resulting in a muddy, unrecognizable mess. You must learn to ruthlessly edit your ideas down to their most essential elements. Giving the engine a massive "word salad" is a guaranteed way to waste your valuable generation credits.
Relying on Vague and Emotional Descriptions
Computers do not understand human feelings, abstract concepts, or personal memories. Typing a phrase like "a beautiful memory of my childhood summer" means absolutely nothing to a mathematical algorithm. What is beautiful to you might look entirely different to the machine's internal data set.
Instead of using vague emotional words, you must describe the actual physical elements that create that emotion. Instead of typing "scary", you should type "dark shadows, heavy fog, abandoned building, cold blue lighting".
You must translate your abstract feelings into hard, physical visual data. If you fail to do this, the software will just guess what you mean, and it will almost always guess incorrectly.
Ignoring the Importance of Subject Order
Most people do not realize that the system pays the most attention to the very first words you type. As your sentence gets longer, the words at the absolute end are given much less mathematical weight. If you bury your main character at the end of a long paragraph, they will probably look terrible.
Many users start their descriptions by talking about the background, the weather, and the camera angle first. By the time they finally mention the main subject, the machine has already run out of processing attention.
Always put your most important element at the very beginning of your text box. A good rule of thumb is: Subject first, environment second, camera and lighting last.
Blindly Trusting Default Platform Settings
Every single generation platform comes with default settings designed to make average pictures look decently good for casual users. However, these default settings are completely terrible if you are trying to achieve strict, professional accuracy. People assume the software automatically knows the best size, shape, and style for their specific idea.
This lazy approach leads to cropped heads, distorted bodies, and incredibly generic art styles. You must take full responsibility for adjusting the aspect ratios and styling values for every single project.
If you use these tools for professional business projects, you also need to manage your usage rights properly. Just like a complete blueprint for documenting workplace discrimination before seeking legal help, having a clear record of your commercial licenses protects you from unexpected legal trouble. Understanding the rules of your platform is just as important as typing the right words.
To stay updated on safe and accurate technology usage, you can check guidelines from authoritative sources. Groups like the National Institute of Standards and Technology regularly publish frameworks on how to interact with these systems securely and effectively.
Your Daily Action Plan for Flawless Digital Art
We have covered a massive amount of ground today, completely changing how you interact with these powerful digital tools. You now realize that getting perfect results is not about magic; it is about clear communication and logical testing. By treating the software like a strict mathematical engine, you immediately gain the upper hand.
You no longer have to cross your fingers and hope for a lucky generation. You can actively dictate the camera angle, control the lighting, and fix tiny errors without losing your mind. This newfound control will bring the joy and excitement back to your creative workflow.
The Ultimate Final Checklist
Starting tomorrow morning, I want you to completely change how you approach that blank text box. First, write down your core subject using plain, simple tags separated by commas. Second, immediately set up your negative guardrails to keep the ugly distortions away.
Third, adjust your canvas shape so the machine has enough physical room to draw your vision. Finally, use the power of inpainting to fix those small annoying details instead of throwing the whole picture in the trash.
If you follow this exact sequence, you will save countless hours and hundreds of wasted credits. The MIT Computer Science and Artificial Intelligence Laboratory often highlights how structured inputs lead to significantly higher quality outputs in machine learning models. Your structured, thoughtful approach is the absolute key to stunning visual success.
I remember how totally defeated I felt when I could not get a simple picture of a coffee cup to look right. I promise you, the moment you use these specific techniques and get that first perfect, flawless image, your entire perspective will change forever. You have all the knowledge you need right now, so open up your software and start creating with total confidence.
Questions People Constantly Ask About AI Image Accuracy
Why do AI generated faces look melted or distorted sometimes?
The software often struggles with faces when the camera is zoomed out too far, like in a large crowd shot. Because there are not enough pixels dedicated to the small faces, the machine completely guesses the facial geometry. You can fix this instantly by asking for a "close-up portrait" or using the inpainting tool on the specific face.
Do I need a highly powerful computer to make good digital images?
Not necessarily, because most popular generation tools are entirely cloud-based. This means the heavy processing happens on massive servers owned by the software company, not on your personal laptop. As long as you have a stable internet connection and a basic web browser, you can create stunning professional art.
Is it considered bad practice to use someone else's text descriptions?
Absolutely not, as studying successful prompts is actually the fastest way to learn how the mathematical models work. Many professionals share their exact settings to help beginners understand the complex relationship between words and visual outputs. You can study their structures and slowly modify them to fit your own unique creative ideas.
How can I easily stop the machine from cutting off my subject's head?
This annoying issue almost always happens because you are using the wrong canvas shape for your specific subject. If you ask for a full-body standing portrait but use a wide horizontal frame, the machine runs out of vertical room. Always make sure you change your aspect ratio to a tall vertical format when generating standing characters.
It took me months of painful trial and error to figure this all out, but you can start making incredible digital art right now just by using these simple rules. Do not let a few weird pictures scare you away—take a deep breath, tweak your text, and watch your amazing ideas finally come to life!
Disclaimer: The information provided in this article is for educational and informational purposes only. The accuracy of AI-generated content can vary greatly depending on the platform, updates, and user inputs. Always review the specific terms of service, commercial licensing agreements, and content policies of the individual software you are using before publishing your generated images.