
The Messy Mistakes I Made (And Why You Should Care)
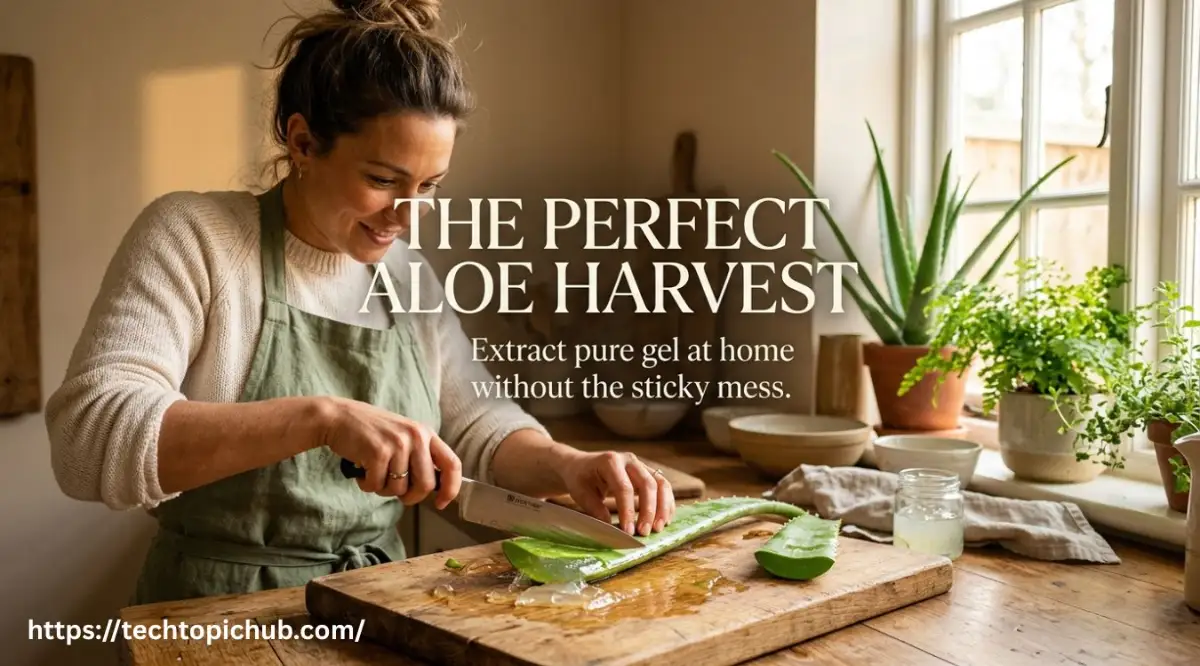
My kitchen counter looked like a crime scene covered in sticky yellow slime. Turns out, slicing open an aloe vera leaf isn't as simple as those satisfying TikTok videos make it seem. If you just chop it and rub the raw gel on your skin, you're practically asking for a red, itchy rash. I had to learn the hard way that preparing this green plant requires a few specific steps to actually get the soothing benefits. Here is exactly how to harvest it safely without ruining your clothes or breaking out your face.
I still remember the first time I tried to harvest an aloe vera leaf from my little indoor garden. I honestly thought I could just slice the green plant open and rub the fresh juice straight onto my skin. Within a few minutes, my face felt incredibly itchy, red, and completely irritated.
I had no idea what went wrong. I had completely ignored the strong-smelling, yellow liquid actively seeping out from the base of the leaf. That sticky yellow sap ended up staining my favorite white shirt, made my skin angry, and left me feeling entirely defeated.
I almost threw the whole plant in the trash that afternoon. I felt so frustrated because I really wanted to rely on natural skincare, but it seemed like a total disaster.
We often turn back to buying expensive, store-bought bottles filled with artificial colors and chemical preservatives because it just feels easier. But settling for those fake green gels means you are missing out on the true magic of the pure plant.
The Short Version: How to Get It Right
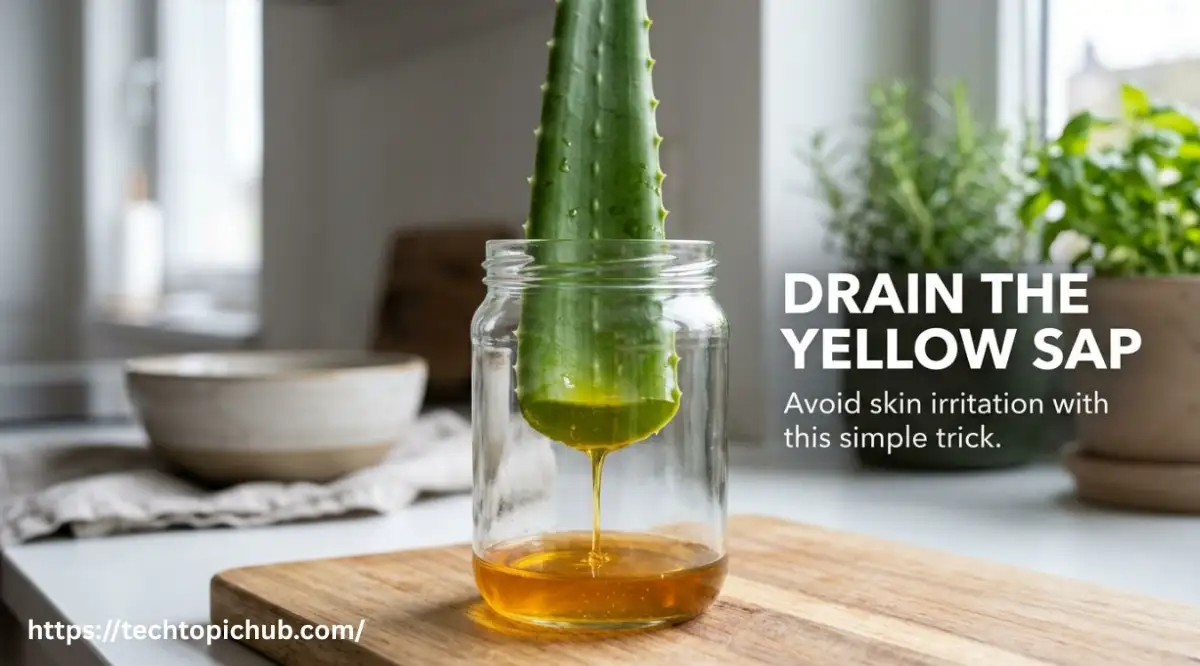
- Always drain the yellow sap: Let the cut leaf stand in a glass for 30 minutes to remove the aloin (the stuff that makes your skin itch).
- Pick the right leaf: Harvest thick, mature outer leaves closest to the soil.
- Ditch the knife: Use a kitchen spoon to scoop out the clear center so you don't accidentally shave off the irritating green rind.
- Freeze the leftovers: Blend the clear chunks for 10 seconds and freeze them in ice cube trays for sunburn emergencies that last up to 6 months.
The Science of the Leaf: What Are We Actually Dealing With?
Before we start cutting into things, we need to understand exactly how this amazing plant works. If you treat an aloe leaf like a standard vegetable, you will quickly run into trouble.
The leaf is naturally divided into a few completely different layers. The thick, green outer rind protects everything inside from the harsh sun and dry air.
Just beneath that tough green skin lies a network of tiny tubes holding the yellow sap. Scientists call this sap aloin or aloe latex. This specific part of the plant is designed to taste incredibly bitter to stop animals from eating it in the wild.
This yellow latex is exactly what causes severe skin irritation, redness, and even allergic reactions for many people. The actual prize we want is the totally clear, thick inner gel hiding right in the center.
Your main goal today is separating that pure, glass-like center from the toxic yellow edges. Once you learn this simple separation method, your entire homemade skincare routine changes forever.
Step 1: Choosing the Perfect Leaf for Harvesting
You cannot just grab any random leaf from your plant and expect a great result. The age and size of the leaf matter a lot for the quality of the nutrients.
Always look near the very bottom of the plant, closest to the soil. These outer leaves are the oldest, thickest, and most mature ones available.
They contain the highest amount of pure, soothing moisture. Gently press the leaf between your fingers to make sure it feels firm and deeply hydrated, not squishy or thin.
Use a clean, sharp knife to cut the leaf right at the white base where it meets the main stem. Never just pull or tear the leaf off with your hands, as this heavily damages the mother plant.
Step 2: The Vertical Drain (Your Skin's Best Friend)
Now comes the absolute most important part of the entire process. As soon as you make that cut, you will see the yellow aloin immediately starting to ooze out.
Do not let this touch your bare skin or your clothes.
How to properly drain the sap:
- Take a clean glass jar or a heavy cup.
- Place the freshly cut leaf inside the jar, standing it straight up.
- The cut end must be pointing directly down toward the bottom of the glass.
- Leave it completely alone for at least 20 to 30 minutes.
You will clearly see a puddle of ye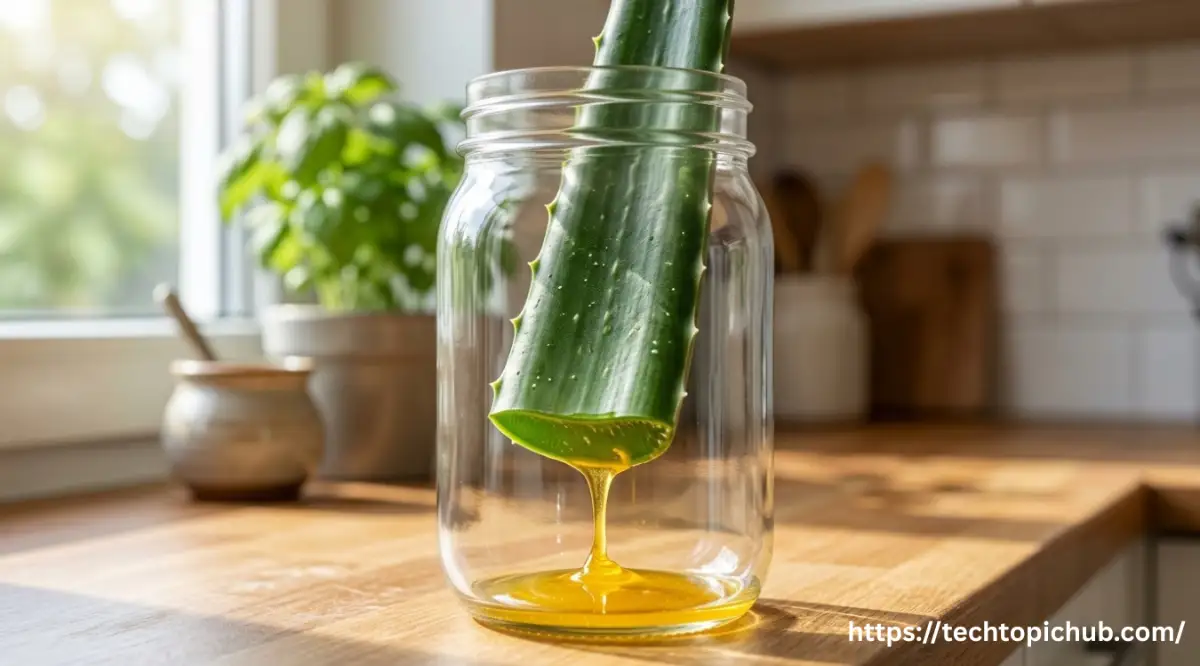 llow, strong-smelling liquid pooling at the bottom of the jar. By letting gravity do all the hard work, you easily protect your skin from redness and severe itching.
After 30 minutes, take the leaf to the sink and wash the cut end thoroughly with plain, cool water.
Quick Pro-Tip: How do you know for sure the leaf is completely drained? Gently wipe the cut end with a white paper towel. If you see any yellow tint at all, put it back in the jar for another 10 minutes. Rushing this step is the number one reason people end up with contact dermatitis from homemade aloe.
If you are still a little worried about how to safely separate the clear jelly from the harsh yellow sap, watch this quick visual guide below before you make your first cut. Check out the video to see the exact draining method, and then keep reading below to discover my favorite freezing trick for long-term storage!
[Insert YouTube Video Link Here]
Step 3: Washing and Prepping the Workstation
Working with this slippery plant requires a highly controlled environment. If your hands or tools are dirty, bacteria will quickly ruin your fresh batch.
Scrub your hands with soap and hot water. Wash the entire outside of the green leaf to remove any dust or dirt from the garden.
Dry the skin completely using a clean paper towel. If the green rind is wet, it will slide all over your cutting board like a bar of wet soap.
Set up a clean wooden or plastic cutting board, a sharp knife, and a regular kitchen spoon.
Step 4: Removing the Unwanted Spikes
The edges of the leaf are lined with sharp, tiny teeth that make handling it very uncomfortable. We need to get rid of these first.
Lay the dry leaf flat on your cutting board. Take your sharp knife and slice a thin, straight line down both sides of the leaf.
You only need to cut off about a quarter of an inch on each side to remove the spikes completely. Now you have a smooth, safe, rectangular piece of plant to work with.
If the leaf is very long, slice it straight across into smaller, two-inch blocks. Managing smaller blocks is infinitely easier than wrestling with a massive, slippery green sword.
Step 5: Filleting the Green Outer Rind
This is the exact moment where patience truly pays off. You want to remove the flat, top layer of the green skin without digging into the clear center.
Slide your sharp knife right under the top green skin, keeping the blade completely flat. Gently slide it across the length of the block, peeling the skin back just like you would fillet a fish.
Once the top skin is gone, you will see the gorgeous, completely clear inner layer shining back at you.
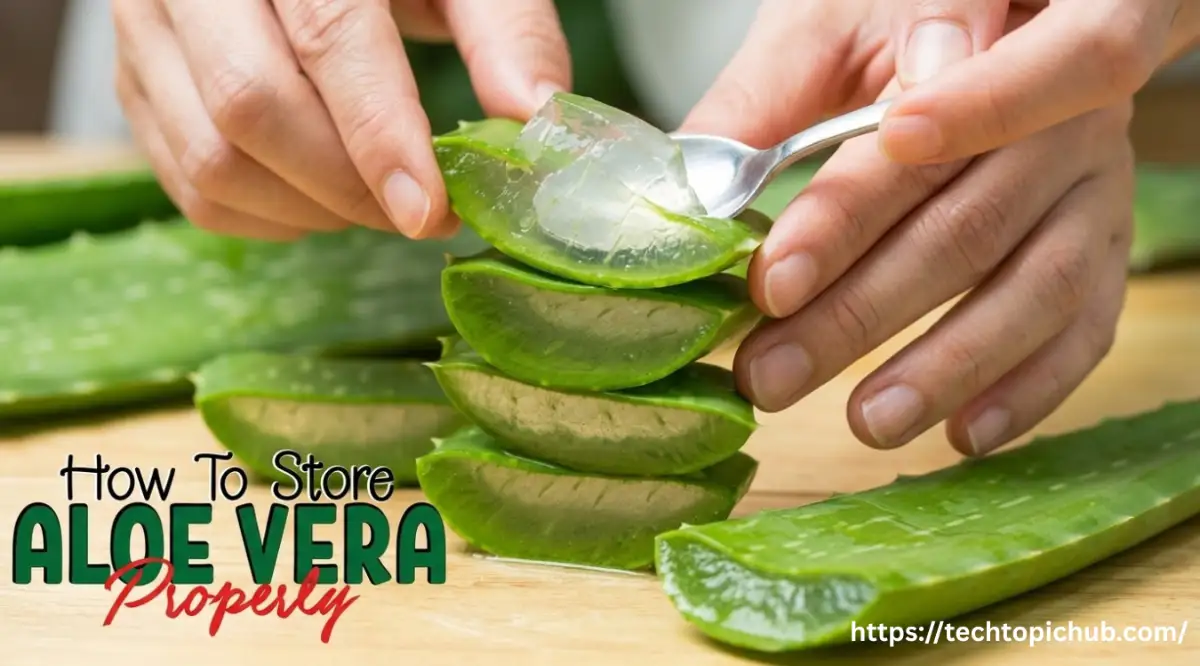
I once tried to scrape the good stuff out with my sharp knife and ended up getting tiny bits of the tough, itchy green skin mixed into my bowl. My best personal advice? Always use a standard kitchen spoon to scoop out the clear center—it perfectly separates the soft inside from the hard outer shell without making a huge mess.
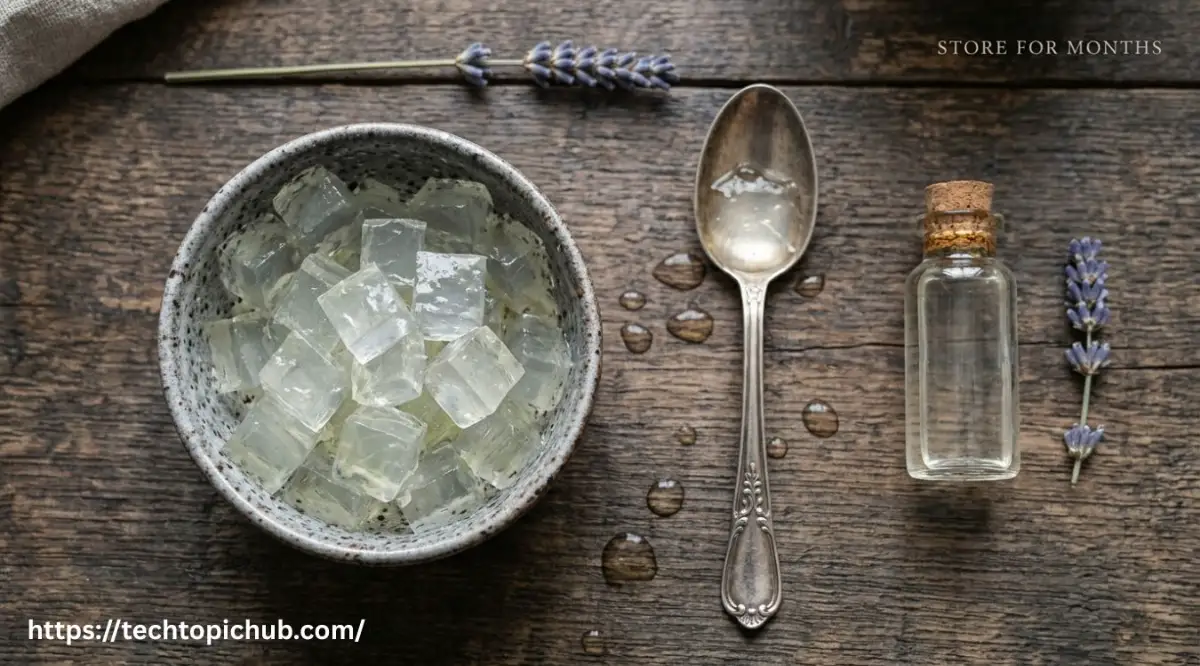
Gently run the edge of your spoon along the bottom skin, scooping out the clear, solid chunk. Place these pure, clear blocks into a clean glass bowl.
The Quality Check: Myth vs Reality
There is a lot of confusing information out there about what pure, fresh aloe should actually look and feel like. Let us clear up the facts right now.
- Myth: Real aloe gel should look bright green in the bowl.
- Reality: Pure, extracted gel is completely clear and almost totally transparent. If a store-bought brand is bright green, they heavily added artificial food coloring.
- Myth: The fresh gel has a strong, flowery, sweet perfume smell.
- Reality: The real thing actually smells slightly earthy, green, and occasionally a tiny bit like raw garlic or onions. This earthy scent is 100% natural and quickly fades away once applied.
If you spot any leftover yellow tint on your clear chunks, wash them quickly under cool running water. You only want the glassy, clear pieces in your final bowl.
Step 6: Blending for the Perfect Consistency
Right now, you have solid, slippery chunks sitting in your bowl. If you try to rub a solid chunk on your face, it simply slides right off and hits the floor.
We need to turn these chunks into a smooth, usable liquid. Toss your clear pieces directly into a clean blender or a small food processor.
Here is a quick realization from my own messy kitchen experiments: do not run your blender on a high speed! I once blended my clear chunks way too fast, and I ended up with a giant bowl of useless, stiff white foam that took hours to settle down. Gently pulsing the machine for just a few short seconds keeps the liquid perfectly smooth and ready to use.
Do not add any water, oil, or extra liquids. Just pulse the machine gently for about ten to fifteen seconds.
At first, the mixture will suddenly look very white and foamy at the top. Do not panic, this is a completely normal reaction caused by air mixing into the liquid.
Let the blender sit quietly for about five minutes. The foam will slowly disappear, leaving you with a wonderfully smooth, slightly watery consistency.
Wait, Why Did My Aloe Turn Pink?
If you leave your freshly blended clear liquid in the fridge and notice it turning slightly pink or purple a few days later, don't panic and throw it out! This is a completely natural enzyme reaction caused by the plant compounds mixing with oxygen. While it looks a bit weird, a light pink tint means your batch is actually raw, active, and perfectly safe to use.
Step 7: Storing Your Fresh Batch Properly
Freshly blended plant matter has a surprisingly short lifespan. Because you did not add any chemical preservatives, bacteria will start growing very quickly if left at room temperature.
You generally have two highly effective options for storing your new batch.
The Refrigerator Method
If you plan to use your batch this week, grab a small, sterilized glass jar with a very tight-fitting lid. Pour the smooth liquid inside and immediately place it in the back of your fridge.
The back of the fridge stays much colder than the door. If you want to naturally extend the fridge life by a few extra days, pierce a single Vitamin E capsule and squeeze the oil into the jar.
Give it a quick stir. The Vitamin E acts as a very mild, natural antioxidant that helps prevent the mixture from turning brown.
The Freezer Cube Method
This is by far my absolute favorite way to handle a large harvest. Grab a clean, empty silicone ice cube tray from your kitchen drawer.
Carefully pour the blended liquid directly into the individual cube slots. Place the tray flat in the freezer overnight.
By the next morning, you will have perfectly portioned, frozen blocks of pure healing power. You can pop these frozen cubes out and store them in a secure ziplock bag in the freezer for months.
Whenever you get a nasty sunburn or a random skin flare-up, simply grab one single cube. Rubbing a frozen block directly onto hot, irritated skin provides an instantly cooling and incredibly soothing relief.
Everyday Uses: Making the Most of Your Harvest
Now that you have safely extracted and stored your fresh batch, how do you actually use it in your daily life? The possibilities are practically endless once you remove the harmful sap.
For Your Face and Skin:
It works brilliantly as a lightweight, everyday moisturizer for people dealing with oily skin. Simply apply a thin layer over your clean face before going to sleep.
The natural properties absorb rapidly, leaving zero greasy residue behind on your pillows. It dramatically helps calm down angry redness from unexpected breakouts.
For Your Scalp and Hair:
Most people totally forget that this plant is a miracle worker for dry, itchy scalps. Take about three tablespoons of your fresh liquid and massage it deeply into your hair roots before a shower.
Leave it on your head for twenty minutes. It actively works to hydrate the scalp skin and leaves your hair strands looking incredibly shiny and soft.
For Minor Kitchen Burns:
If you accidentally touch a hot pan while cooking dinner, act fast. Run the minor burn under cold water first, then immediately apply a thick layer of your chilled gel.
The cooling sensation directly from the fridge heavily reduces the stinging pain. It forms a gentle protective layer over the skin while it naturally recovers.
Understanding the True Value of Your Effort
When you take the time to safely harvest this plant, you take total control over exactly what goes onto your body. You completely avoid hidden alcohols, strong artificial fragrances, and unnecessary chemical thickeners.
You learn to deeply appreciate the natural process. Yes, peeling the green rind and waiting for the yellow sap to drain takes a little bit of patience and focus.
But holding a jar of pure, safe, perfectly clear hydration that you made with your own two hands is incredibly rewarding. It saves you money, protects your skin, and brings a wonderful piece of nature directly into your daily routine.
Always respect the plant by draining the latex correctly. Take your time with the filleting knife, and do not rush the blending process.
Your skin will actively thank you for putting in that little bit of extra care today.
Taking Your Natural Skincare Routine to the Next Level
Once you master the basic steps of draining and filleting your green leaf, a whole new world of home remedies opens up. You do not just have to use the plain, clear liquid exactly as it is.
By making a few smart additions, you can easily turn that simple bowl of plant extract into a high-end spa treatment. This is where you start seeing serious, long-term changes in your daily appearance.
Think about your skin like a completely dried-out kitchen sponge. If you just splash a little bit of water on top of a dry sponge, the water just rolls right off the sides.
Your face acts the exact same way. If you want this natural hydration to actually sink in deeply, you need to prepare your face correctly first. Always apply your freshly blended mixture to slightly damp skin right after you step out of the shower.
When your pores are already open and slightly warm, they pull the soothing nutrients deep inside much faster. This simple timing trick makes a massive difference in how soft your face feels the next morning.
The Famous Moisture Sandwich Technique
One of the smartest things I ever learned about plant-based hydration is how quickly it can evaporate. Because this clear jelly is mostly made of natural water, dry indoor air will simply suck it right back out of your pores.
To stop this from happening, you need to create what experts call a moisture sandwich. After you rub a generous layer of your homemade mixture onto your face, wait exactly sixty seconds.
While your face is still feeling a little bit tacky and wet, grab your favorite daily face cream or a few drops of natural face oil. Gently press that thick cream directly over the wet layer.
The heavy oil in your cream acts like a physical barrier, trapping the watery plant nutrients tightly against your skin all day long. This single habit completely stops that tight, dry feeling people often complain about in the afternoon.
Upgrading Your Frozen Recovery Cubes
We already talked about how freezing your liquid into small blocks is the safest way to store it long-term. But you can easily upgrade those frozen blocks by mixing in extra healing ingredients before they go into the freezer.
If you wake up with puffy, tired eyes every single morning, try brewing a strong cup of plain green tea. Let the tea cool down completely, then mix it half-and-half with your pure plant extract.
Pour this green tea mixture into your ice tray. The natural caffeine from the tea, combined with the freezing cold temperature, shrinks morning eye bags incredibly fast.
If you struggle with occasional acne breakouts, try stirring a small spoonful of raw, organic honey into your blender. Honey has amazing natural antibacterial properties that work perfectly alongside the soothing plant compounds.
When you start making your own skincare at home, you naturally save a lot of money every single month. You can easily redirect those savings to bigger life goals, like figuring out the secret to building an emergency fund without ignoring your debt instead of buying overpriced cosmetic bottles.
Caring for the Mother Plant Long-Term
If you want a never-ending supply of fresh healing goodness, you have to treat the main indoor plant with deep respect. You cannot just keep chopping leaves off every single week and expect the plant to survive.
A healthy indoor succulent needs plenty of time to recover after you take a mature leaf from its base. Always wait at least a month before harvesting another leaf from the exact same pot.
Make sure your pot has excellent drainage holes at the very bottom. These desert plants absolutely hate sitting in heavy, wet soil, which quickly rots their shallow roots.
Give the mother plant plenty of bright, indirect sunlight next to a clear window. According to the gardening experts who study indoor succulent care and watering techniques, letting the top two inches of soil dry out completely before adding more water keeps the plant incredibly happy.
If you treat the main root system well, that one single pot will happily provide you with fresh, soothing remedies for many years to come.
The Hidden Dangers of Improper Preparation
Even though this is a completely natural remedy, nature still has plenty of strict rules you must follow. Making a careless mistake in your kitchen can quickly turn a healing session into an itchy, uncomfortable nightmare.
I see people rushing through the cleaning process all the time because they are excited to try their new remedy. But skipping corners always leads to a ruined batch or angry skin.
You must be fully aware of the traps that cause beginners to fail. Avoiding these common errors saves your time, your money, and protects your sensitive skin barrier.
The Kitchen Counter Trap
The absolute most common mistake people make is leaving their newly blended liquid sitting out on a warm kitchen counter. We are so used to store-bought bottles that sit on a shelf for months without going bad.
You must remember that you are dealing with raw, unpreserved plant food. Leaving this pure, watery mixture at room temperature is basically throwing a massive welcome party for invisible bacteria.
Within just two days on a warm counter, your beautiful clear batch will start to smell sour, turn slightly cloudy, and grow harmful mold. If you accidentally rub that spoiled liquid on a fresh sunburn, you risk getting a nasty skin infection.
The moment you finish blending your clear chunks, put the jar straight into the cold refrigerator. Treat it exactly like you would treat a glass of fresh milk.
Ignoring the Mandatory Patch Test
Sometimes, life gets incredibly stressful and busy. If you are going through a major life transition, like looking for a proven way to speed up the home selling process in a sluggish housing market, your stress levels directly affect your skin's sensitivity.
When your skin is already stressed, slapping a brand new ingredient all over your face is a terrible idea. Even if you drained the yellow sap perfectly, a very small number of people are naturally allergic to the clear part of the plant itself.
Never skip the patch test. Medical professionals strongly advise performing a simple skin patch test before adding any raw botanical ingredient to your routine.
Simply rub a tiny drop of your fresh mixture on the inside of your wrist or behind your ear. Wait a full twenty-four hours to see if any red bumps or burning sensations appear.
If your wrist feels completely fine the next day, you are safe to move forward with a full face application. Taking this one tiny precaution saves you from walking around with a swollen, angry red face.
Using the Wrong Tools for the Job
Working with this slippery plant is honestly a bit tricky if you grab the wrong kitchen tools. Using a dull knife is one of the most frustrating mistakes you can possibly make.
Using a bad blade on this delicate leaf is exactly like trying to slice a very ripe tomato with a spoon. You just end up aggressively crushing the green skin and mashing the bad outer layers deep into the good center.
Always use a freshly sharpened, small paring knife to carefully slice off the sharp side teeth. A smaller blade gives you total control, ensuring your fingers stay completely safe from slipping.
When you scoop the clear center out, do not use a sharp metal edge. A standard round kitchen spoon easily glides along the flat bottom, leaving the tough green shell completely behind.
Applying Over Deep or Open Wounds
Because this plant is famous for soothing minor irritations, people often make the dangerous mistake of using it on serious injuries. It is fantastic for mild, red sunburns or tiny kitchen scratches.
However, you should never push raw, unsterilized plant matter into a deep cut or a heavily bleeding wound. Even if you washed your hands, microscopic dirt from the garden can easily enter your bloodstream.
Medical guidelines for treating cuts and severe thermal injuries clearly state that deep tissue requires sterile medical bandages, not homemade kitchen remedies. Keep your natural plant remedies strictly reserved for surface-level irritation, mild heat rashes, and general daily hydration.
Your New Daily Habit for Healthier Skin
Taking control of exactly what goes onto your body is an incredibly powerful feeling. You no longer have to blindly trust complicated chemical labels on the back of shiny plastic tubes.
By taking just twenty extra minutes out of your weekend, you create a deeply healing, absolutely pure product right at your own kitchen sink. You know exactly where it came from, how it was washed, and that it contains zero artificial garbage.
You have learned how to respect the older leaves, how to drain away the harsh yellow sap, and how to gently scoop out the glassy center. You now understand that keeping your batches cold in the fridge or freezer is the absolute best way to protect your hard work.
You can always explore our main Tech Topic Hub homepage for more interesting guides, but taking action on this natural knowledge today is a perfect place to start. Building this simple, calming habit into your weekly schedule will slowly transform the way your skin handles dry weather and unexpected breakouts.
I promise you, the first time you rub that freezing cold, pure green tea infused cube onto a tired face, you will completely forget about the messy preparation. My own skin changed forever when I finally stopped buying fake green bottles and started deeply trusting the real plant sitting right in my kitchen window. You have all the practical knowledge you need sitting in your hands right now, so go grab a sharp knife, find a mature leaf, and start your own natural healing journey today.
Frequently Asked Questions About Handling Fresh Plant Extract
Can I apply the freshly scooped chunks directly to my face without blending?
Yes, you absolutely can rub a solid, clear chunk directly onto a sunburn or dry patch. However, blending it simply turns the slippery solid into a smooth liquid, making it much easier to spread evenly across larger areas like your arms or legs.
Why does my newly cut leaf smell slightly like onions or garlic?
That slightly sharp, earthy smell is completely normal and means your plant is healthy. The strong scent comes from natural sulfur compounds hiding near the green rind, and the smell quickly disappears a few minutes after you apply the clear liquid to your skin.
Will this clear up my dark spots and acne scars overnight?
No natural remedy works like an instant magic eraser. While the deep hydration heavily supports your skin's natural healing process, you need to apply it consistently for several weeks before you notice dark spots beginning to fade gently.
Can I sleep with this clear watery layer on my face all night?
Yes, it acts as a wonderful, lightweight, invisible sleep mask for your skin. Because it absorbs completely without leaving any sticky or greasy oil behind, it will not ruin your clean pillowcases while you sleep.
Does it matter if I accidentally leave a tiny piece of green skin in my blender?
If it is just a tiny green speck, it will not completely ruin the batch, but you should try to pick it out. The green skin is very tough and contains traces of the itchy yellow sap, which might mildly irritate a sensitive patch of skin.
Seeing my skin look so clear and hydrated every morning makes all those extra minutes of careful prep work totally worth it. I know taking the time to properly drain and chop the leaves feels like a chore right now, but your skin will genuinely thank you for it tomorrow. Go ahead and give it a try—you are going to absolutely love the natural results!
Disclaimer: The information provided in this article is for general educational and informational purposes only and is not intended as substitute medical advice. Natural botanical remedies can cause allergic reactions in some individuals. Always perform a standard skin patch test before applying new ingredients, and consult a certified dermatologist or medical professional regarding severe skin conditions, deep wounds, or persistent irritation.
![Hidden Papaya Hacks for Glowing Skin and Beauty [Read Before Bed]](https://techtopichub.com/storage/uploads/blogs/1789407194_hidden-papaya-hacks-for-glowing-skin-and-beauty-read-before-bed.webp)

![The Ultimate Chemical-Free Routine for Better Skin Care and Skin Health [Save Money]](https://techtopichub.com/storage/uploads/blogs/1789228392_the-ultimate-chemical-free-routine-for-better-skin-care-and-skin-health-save-money.webp)