
The Nightmare of Changing Servers: My Personal Migration Disaster
Moving your website to a new server shouldn't feel like gambling with your entire income. Most people click 'transfer' and pray, only to end up with a broken homepage and zero sales. I've been in those 3 AM shoes, staring at database errors and losing sleep. This guide is my simple, no-nonsense strategy to help you move your site without a single second of downtime.
I remember staring at my laptop screen at 3 AM, my heart pounding loudly in my chest. My most profitable website was completely down, displaying a terrifying database connection error for everyone to see. I had simply tried to move my files to a new web hosting provider, thinking it would be a quick and easy process. Instead, I found myself trapped in a digital nightmare, losing money and readers by the minute.
My hands were shaking as I frantically tried to contact customer support, only to be met with automated robotic replies. I felt a deep, sinking pit in my stomach because my main source of income was suddenly inaccessible. Every passing hour meant a drop in my hard-earned search engine rankings and a loss of trust from my loyal audience.
Many website owners face this exact same terrifying scenario when trying to upgrade their hosting servers. The sheer thought of breaking a perfectly functioning website keeps thousands of people stuck with slow, overpriced, and terrible hosting providers. You might be putting up with terrible server speed right now simply because you are too afraid of the technical disaster that might follow a move.
⚡ Quick Guide: The 'No-Panic' Migration
If you are in a hurry, keep these 4 golden rules in mind:
- Always Manual: Never trust auto-migrators blindly; keep your own zip file backup on your computer.
- The 48-Hour Rule: Keep your old host active for at least 2 days after switching nameservers.
- The Hosts File Trick: Preview your site on the new server before you go live to catch errors in private.
- SSL First: Activate your security certificate the moment the domain points to the new server to avoid 'Not Secure' warnings.
Preparing Your Digital House for the Big Move
Think of changing your web host like moving your physical belongings to a brand-new apartment. You would never just throw all your fragile glasses and expensive electronics loosely into the back of a moving truck. You need a highly organized packing strategy to ensure every single item arrives safely and perfectly intact at your new destination.
Before we touch anything on the new server, we need to carefully inventory exactly what makes up your website. Your website is basically just a collection of files and a digital database working closely together to display information. If either of these two components gets separated or damaged, your digital storefront will completely stop working.

The Pre-Migration Checklist (Don't Skip These!)
Before you touch any files, make sure you have these four things ready:
- Old Host Login: For exporting files and checking settings.
- Domain Registrar Access: To update your DNS later.
- New Host IP Address: You'll need this to test the site privately.
- Current PHP Version: If your old site is on PHP 7.4 and the new one is on 8.2, things will break.
The very first action you must take is generating a complete, unbreakable backup of your current setup. Do not simply rely on the automatic backups provided by your old hosting company. You need to take matters into your own hands by manually downloading a copy of your entire file directory directly to your personal computer hard drive.
Right alongside those files, you must carefully export your MySQL database. This database holds all your written text, your custom settings, and your user profiles. Having this physical copy securely stored on your own device gives you the ultimate peace of mind. Even if the entire internet breaks during the transfer, you still hold a perfect copy of your website safe and sound in your hands.
I learned this the hard way during my second migration attempt when my old host suddenly suspended my account mid-transfer. My Pro Tip: Always download a zip file of your website to an external USB drive just to have a physical, offline safety net. Having that extra layer of security completely eliminated my anxiety during all my future server changes.

Setting Up Your New Server Environment Properly
Now that your belongings are safely packed, you need to prepare the new empty apartment before moving the furniture inside. Buying a new hosting plan is exciting, but the server comes completely empty and unprepared for your specific website data. We need to match the new environment perfectly with the old one to avoid confusing your digital files.
Check the specific PHP version your current website is running on right now. You can usually find this information inside your old hosting control panel under the software settings tab. Make sure your new hosting provider is set to use that exact same PHP version before you upload a single file. Mismatched software versions are the number one reason websites break instantly upon arrival at a new host.
Next, you need to create a brand-new, empty database on your new server to act as a receiving container. Carefully write down the new database name, the specific database username, and the secure password you generate for it. You will need to update your website configuration files with these new details later so your site knows exactly where to look for its information.
Want to see exactly how to modify your local hosts file to preview your new site safely before going live? Watch this quick visual breakdown below.
[Insert YouTube Video Link Here]
Moving the Data Safely Across the Web
With the new environment prepared and fully optimized, it is time to start the actual heavy lifting. You will use a secure File Transfer Protocol (FTP) program to upload all your saved files directly into the new server. Depending on the size of your website, this uploading process can take anywhere from a few minutes to several hours.
While the files are slowly transferring, you can head over to your new database management tool, usually called phpMyAdmin. You will use the import function to upload the database file you securely saved to your computer earlier. Take your time with this step and ensure the upload reaches one hundred percent completion without any strange error messages appearing on the screen.
Once the files and the database are happily sitting on the new server, they still need to be introduced to each other. You must open your main website configuration file, which is usually named wp-config.php if you use WordPress. Update this specific document with the new database name and password you wrote down earlier during the preparation phase.
Now your new server is fully loaded with your website, fully connected, and quietly waiting in the background. However, the general public and search engines still have absolutely no idea that this new server even exists. Your domain name is still actively pointing visitors to your old hosting provider.
The Secret Preview Method: Testing Without Going Live
Before we tell the world about your newly migrated website, we need to check if everything actually works perfectly. You never want to point your live traffic to a broken website filled with missing images or strange text formatting. Luckily, there is a very clever way to trick your own computer into visiting the new server privately.
By slightly editing a special document on your computer called the "hosts file," you can force your browser to look at the new server. This allows you to browse the newly copied website exactly as a regular visitor would. You can click on your internal links, test your contact forms, and read your blog posts to ensure absolute perfection.
I actually ruined my live site once because I skipped this private testing phase, wrongly assuming my files transferred perfectly. My biggest piece of advice is to manually click through at least five of your most popular blog posts during this private preview just to make sure your images and text formatting did not break during the move.
If you notice any broken elements, missing style sheets, or weird errors, you can fix them peacefully right now. Nobody else on the internet can see these errors because they are all still visiting the old, perfectly functioning server. This private testing phase is the absolute secret to achieving a completely stress-free, zero-downtime website transfer.
If you feel a bit lost connecting your new database to your website files, I highly recommend watching this short visual walkthrough below. It shows you the exact buttons you need to click on your screen, making it incredibly easy to follow along and finish reading the rest of this guide.
Myth vs Reality: Understanding DNS Propagation
Many website owners get extremely confused about what actually happens when you flip the final switch. Let us break down some common misunderstandings about the final transition phase.
· The Common Myth: The moment I change my nameservers, the entire world instantly sees the new website.
· The Actual Reality: The internet is a massive global network that updates very slowly. It can take up to 48 hours for every single internet provider in the world to recognize your new server location.
· The Common Myth: My website will definitely go offline during this waiting period.
· The Actual Reality: If you keep both the old server and the new server active simultaneously, nobody will experience a single second of downtime.
The Big Switch: Pointing Your Domain Safely
Once you are one hundred percent satisfied with your private testing, it is time to make the big move public. You need to log into the specific company where you originally purchased your domain name. Find the DNS management section or the area labeled "Nameservers."
Replace the old hosting nameservers with the brand-new nameservers provided by your new hosting company. The moment you save these changes, the global internet starts receiving the updated directions to your website. This process is called DNS propagation, and it behaves like a slow rolling wave moving across different countries and cities.
| Method | Best For | Risk Level |
| Nameserver Update | Beginners | Low (Takes 24-48 hours) |
| A-Record Change | Advanced Users | Medium (Updates faster, usually 1-4 hours) |
| Full Migration Service | Non-Techies | Very Low (Let the host handle it) |
For the next day or two, some of your visitors will still be directed to your old server, while others will land on the new one. This is exactly why you must not cancel your old hosting account immediately after changing the domain settings. Keeping both servers completely active ensures a seamless experience for every single user, regardless of which server their local internet provider directs them to.
Email Migration: The Often Forgotten Disaster Zone
While focusing heavily on website files, many business owners completely forget about their professional email accounts. If your domain emails are hosted on the same server as your website, moving hosts means moving your emails too. Failing to prepare for this will result in lost customer inquiries and bounced communication.
Before changing the nameservers, you need to recreate all your specific email addresses identically on the new server. If you currently have a contact email and a support email, create those exact same addresses in the new hosting dashboard. Set up strong passwords and configure your mobile phone to connect to the new email routing system.
During the global propagation window, emails might arrive randomly in either your old server inbox or your new server inbox. You need to carefully monitor both locations to ensure you do not miss an important message from a client. Once the 48-hour transition window completely passes, all new emails will successfully flow directly into your new server inbox securely.
Securing the New Digital Home
Search engines absolutely hate insecure websites, and visitors quickly run away from browser security warnings. Your new server needs a fresh SSL certificate to encrypt the data and display that highly trusted padlock icon in the address bar. Most modern hosting providers offer these security certificates completely free of charge.
As soon as the domain officially connects to the new server, navigate to your new hosting dashboard and activate the SSL feature. Sometimes this process requires a few hours to authenticate properly across the web. Test your website using the secure HTTPS protocol to ensure no strange security warnings pop up for your daily readers.
Check all your internal images and style sheets to guarantee they are loading over the secure connection. Sometimes, migrating a site causes images to load over the old HTTP protocol, creating a mixed content error. There are many simple free plugins available that easily search through your database and force all links to use the secure HTTPS format automatically.
Post-Migration Cleanup: Wrapping Up the Process
After waiting a full three days, the global internet will have completely updated its records. Every single person trying to access your domain name is now safely arriving at your brand-new, much faster hosting environment. You have successfully managed the transition without dropping a single visitor or losing any valuable search rankings.
Now, and only now, is it finally safe to contact your old hosting provider and formally cancel your subscription. Log into the old dashboard one last time, verify that you have your external backups stored safely, and close the account. You can now breathe a massive sigh of relief and enjoy the improved speed and performance of your new digital home.
You no longer have to wake up in the middle of the night terrified of server crashes and database errors. By following a logical, step-by-step strategy, you took complete control over your digital assets. Your website is now fully prepared to handle more traffic, serve your audience better, and grow consistently moving forward.
Mastering the Server Transition Like a True Professional
Even after your website safely lands on its new digital foundation, there are several advanced strategies you can use to make the process completely invisible to your readers. These are the exact methods professional system administrators use to protect massive enterprise websites from going offline. You do not need a computer science degree to use these secrets, just a little bit of careful planning.
We are going to look at exactly how you can manipulate time, freeze your data, and clear out old internet memories. Applying these expert-level steps will guarantee that Google never notices a single drop in your server performance.
The Time-Travel Trick: Lowering Your DNS TTL
Every single domain name has a hidden setting called TTL, which stands for Time To Live. This setting simply tells internet service providers exactly how long they should remember your current server address before checking for an update. Most hosting companies set this memory limit to a full 24 hours by default.
If you change your server location with a high TTL, some visitors will be stuck looking at your old website for a whole day. To speed this up, you can log into your domain registrar a few days before your big move and lower the TTL setting. Change the value to 300 seconds, which forces the entire internet to refresh your website location every five minutes.
By making this tiny adjustment early, your eventual server switch will happen almost instantly across the globe. Once your new server is fully active and perfectly stable, you can safely raise the TTL back to its normal limit. You can read more about how global domain systems manage these memory limits through ICANN's official documentation on DNS structures to understand the exact science behind it.
Enforcing a Strict Content Freeze
One of the smartest things you can do during a site transfer is absolutely nothing. I call this the "Content Freeze" protocol, and it has saved me from losing countless hours of hard work. A content freeze simply means you completely stop publishing new blog posts, approving comments, or changing settings.
Imagine you publish a brilliant new article on the old server while your database is still slowly transferring to the new one. That brand-new article will only exist on the old machine, and it will magically disappear the moment your domain points to the new host. Your readers will be incredibly confused, and you will have to rewrite the entire piece from scratch.
To prevent this data mismatch, announce a 48-hour editing break to your team before starting the backup process. Do not touch a single word on your website until you have fully verified that the new server is handling one hundred percent of your live traffic.
Flushing Out the Digital Ghosts (CDN Purging)
If you use a Content Delivery Network like Cloudflare to speed up your website, you have an extra layer of complexity to handle. A CDN takes static pictures of your website and stores them on servers all around the world to load faster for local users. Even after you switch your main hosting server, your CDN might keep serving old, outdated pictures of your site to visitors.
After your new domain connection is fully established, you must log into your CDN dashboard immediately. Look for a large button labeled "Purge Everything" or "Clear Global Cache" and click it without hesitation. This action forces the global network to throw away its old memories and take fresh new pictures of your brand-new server.
Failing to clear this cache often results in visitors seeing a messy, broken layout because the CDN is mixing old design files with new database text. Maintaining strict control over how search engines read your updated site structure is highly recommended by Google Search Central's guide on site migrations. Keeping everything synced perfectly protects your hard-earned search engine rankings.
The Hidden Traps That Will Break Your Digital Business
Over the years, I have watched countless beginners accidentally destroy their own websites by rushing through the transfer process blindly. When panic sets in, people tend to make highly irrational decisions that only make the technical problems much worse. Let us walk through the most dangerous pitfalls so you can carefully step right around them.
Sometimes web hosts will try to charge you unexpected hidden fees for premium migration assistance when you make a mistake. Trying to decode these complicated server billing terms can feel just as frustrating as understanding health deductibles and co-pays at a specialized medical clinic. It is always better to understand the process yourself to avoid paying heavy emergency rescue fees.
The Premature Cancellation Disaster
This is the absolute most common and most devastating mistake a website owner can make. You finish copying your files, you change your domain settings, and you immediately click the cancel button on your old hosting account to save money. Never, ever cancel your old hosting account on the same day you move.
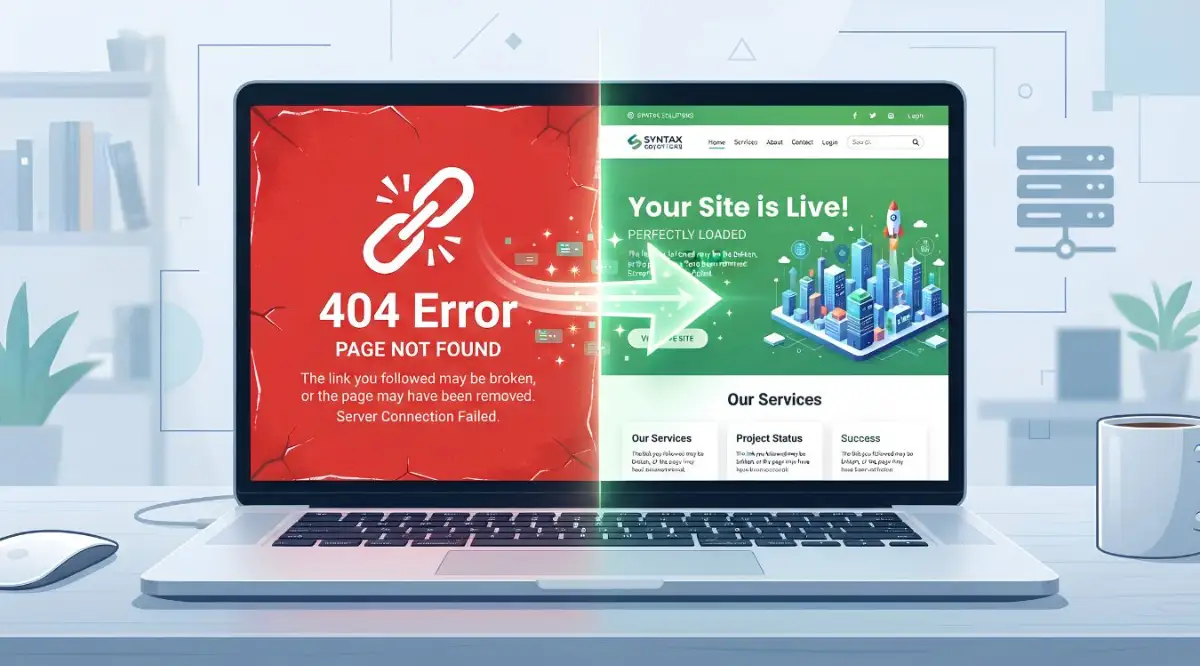
As we discussed earlier, the global internet takes up to 48 hours to fully understand your new location. If you delete your old server too early, half of the world will try to visit it and receive a terrifying "Website Not Found" error. Google bots crawling your site during this time will assume your business has permanently shut down, destroying your SEO instantly.
Keep your old hosting account fully paid and perfectly active for at least one full week after the transition. This gives you a massive safety net in case something goes horribly wrong with the new company. You can always simply point your domain back to the old server instantly if the new one crashes.
Leaving the Invisible Files Behind
When you copy files using a standard transfer program, your computer often hides specific highly sensitive system files from your view. The most famous example is a tiny but incredibly powerful file called the hatches document. This single hidden file controls all your custom web links, your security rules, and your password protections.
If you move your website but leave this invisible file behind, every single internal link on your blog will suddenly show a 404 broken page error. Your homepage might load perfectly, but clicking any article will result in a completely blank screen. You must specifically tell your file manager program to "Show Hidden Files" before you download your initial backup.
If your migration completely fails due to missing files, you will need to contact server technical support immediately. When speaking to technicians, keeping a highly detailed log of every specific error message is exactly like documenting workplace discrimination before seeking legal help. Having clear, written proof of exactly what broke makes fixing the technical problem ten times faster. You can learn more about managing these hidden configurations safely directly through the Apache HTTP Server instructional manuals.
Ignoring the Hardcoded Old Links
Your database is filled with hundreds of internal links connecting your articles together. Sometimes, older websites have links that are hardcoded to a temporary server address or an outdated image folder. When you move to a new environment, these old rigid links will break and point to locations that no longer exist.
You cannot manually read through thousands of blog posts to check every single hyperlink yourself. Instead, you should use a simple database search-and-replace tool to scan your entire website automatically. Command the tool to find any mention of your temporary testing URL and replace it securely with your actual live domain name.
Always run a full backup of your new database before running any automated search and replace functions. One tiny typo during this automated process can accidentally erase important formatting across your entire website. Take your time, double-check your spelling, and run a test simulation first.
Your Fresh Start on a Lightning-Fast Server
You have successfully navigated one of the most stressful technical challenges a website owner can ever face. By carefully organizing your files, testing in private, and waiting patiently for the internet to update, you protected your entire digital livelihood. Your audience did not experience a single second of annoying downtime, and search engines continued to trust your brand.
Now you get to enjoy the absolute best part of this entire journey. You can finally log into your newly hosted website and feel the incredible difference in loading speed. Your images will snap onto the screen instantly, your admin dashboard will feel highly responsive, and your daily visitors will have a much smoother reading experience.
Moving away from a terrible hosting company takes a little bit of bravery and a solid weekend of focused work. But the massive improvements to your mental peace, your search rankings, and your business growth make every single step completely worth it.
My Final Word to You
I know exactly how terrifying it feels to mess around with the digital foundation of your business. But I promise you, taking control of your own website server is the most empowering skill you will ever learn. Take a deep breath, follow these exact protective steps, and give your website the high-speed home it truly deserves today!
Common Questions About Safe Website Transfers
How long does a complete website transfer actually take?
The physical copying of your files and database usually only takes an hour or two depending on your connection speed. However, waiting for the global internet to recognize your new domain location can take an additional 24 to 48 hours.
Will changing my web host ruin my current SEO rankings?
If you follow a zero-downtime strategy and keep both servers active during the transition, your SEO will not be harmed at all. In fact, moving to a faster, more secure server usually improves your search engine rankings significantly.
Can I move my website myself or do I need to hire a professional developer?
You can absolutely move your website yourself by following careful, step-by-step instructions and taking manual backups. If you feel completely overwhelmed, most premium hosting companies offer a free white-glove migration service when you sign up.
What happens to my old server files after the move?
Your old files will sit safely on your previous hosting account until you manually delete them or cancel your subscription. It is highly recommended to leave them completely untouched for at least a week as an emergency backup plan.
Do I need to put my website in maintenance mode during the transfer?
You do not need a public maintenance page if you properly test your new server privately using the host file method. A maintenance page actually causes intentional downtime, which is exactly what we want to avoid for your daily readers.
When I finally got my own blog onto a much faster server without losing a single visitor, the massive boost in my daily traffic made all the technical headaches completely worth it. I know the process feels a bit scary right now, but you have the exact roadmap in your hands—take a deep breath, start backing up your files today, and claim the high-speed website your business deserves.
General Disclaimer: The information provided in this article is strictly for educational and informational purposes regarding web hosting and website management. We do not provide specialized technical, legal, or financial advice. Always consult with your specific hosting provider's technical support team before making major changes to your server environment. We are not responsible for any data loss, ranking drops, or server downtime resulting from the implementation of these strategies.